Setup on iPhone / iPad
The guide is based on the iOS 9.x and IMAP account
Checklist
Setup with Autoconfig (IMAP)
Manual setup on iPad / iPhone based on IMAP
Troubleshoot and change settings for existing email account
Incoming settings
Outgoing settings
Checklist
- Username is your email address eg. post@demo.no
- Password - Unsure of password? Try login at https://webmail.stwcp.net/
- Password for email account changes in https://hcp.stwcp.net - Contact the administrator of the account
Overview of the Advanced User:
| Innstilling | . |
|---|---|
| IMAP server | imap1.stwcp.net (port 143 TLS) |
| POP server | pop1.stwcp.net (port 110 TLS) |
| SMTP server | smtp1.stwcp.net (port 25 eller 587 TLS) |
| Username | |
| Godkjenning / SMTP auth | Password |
Setup with Autoconfig (IMAP)
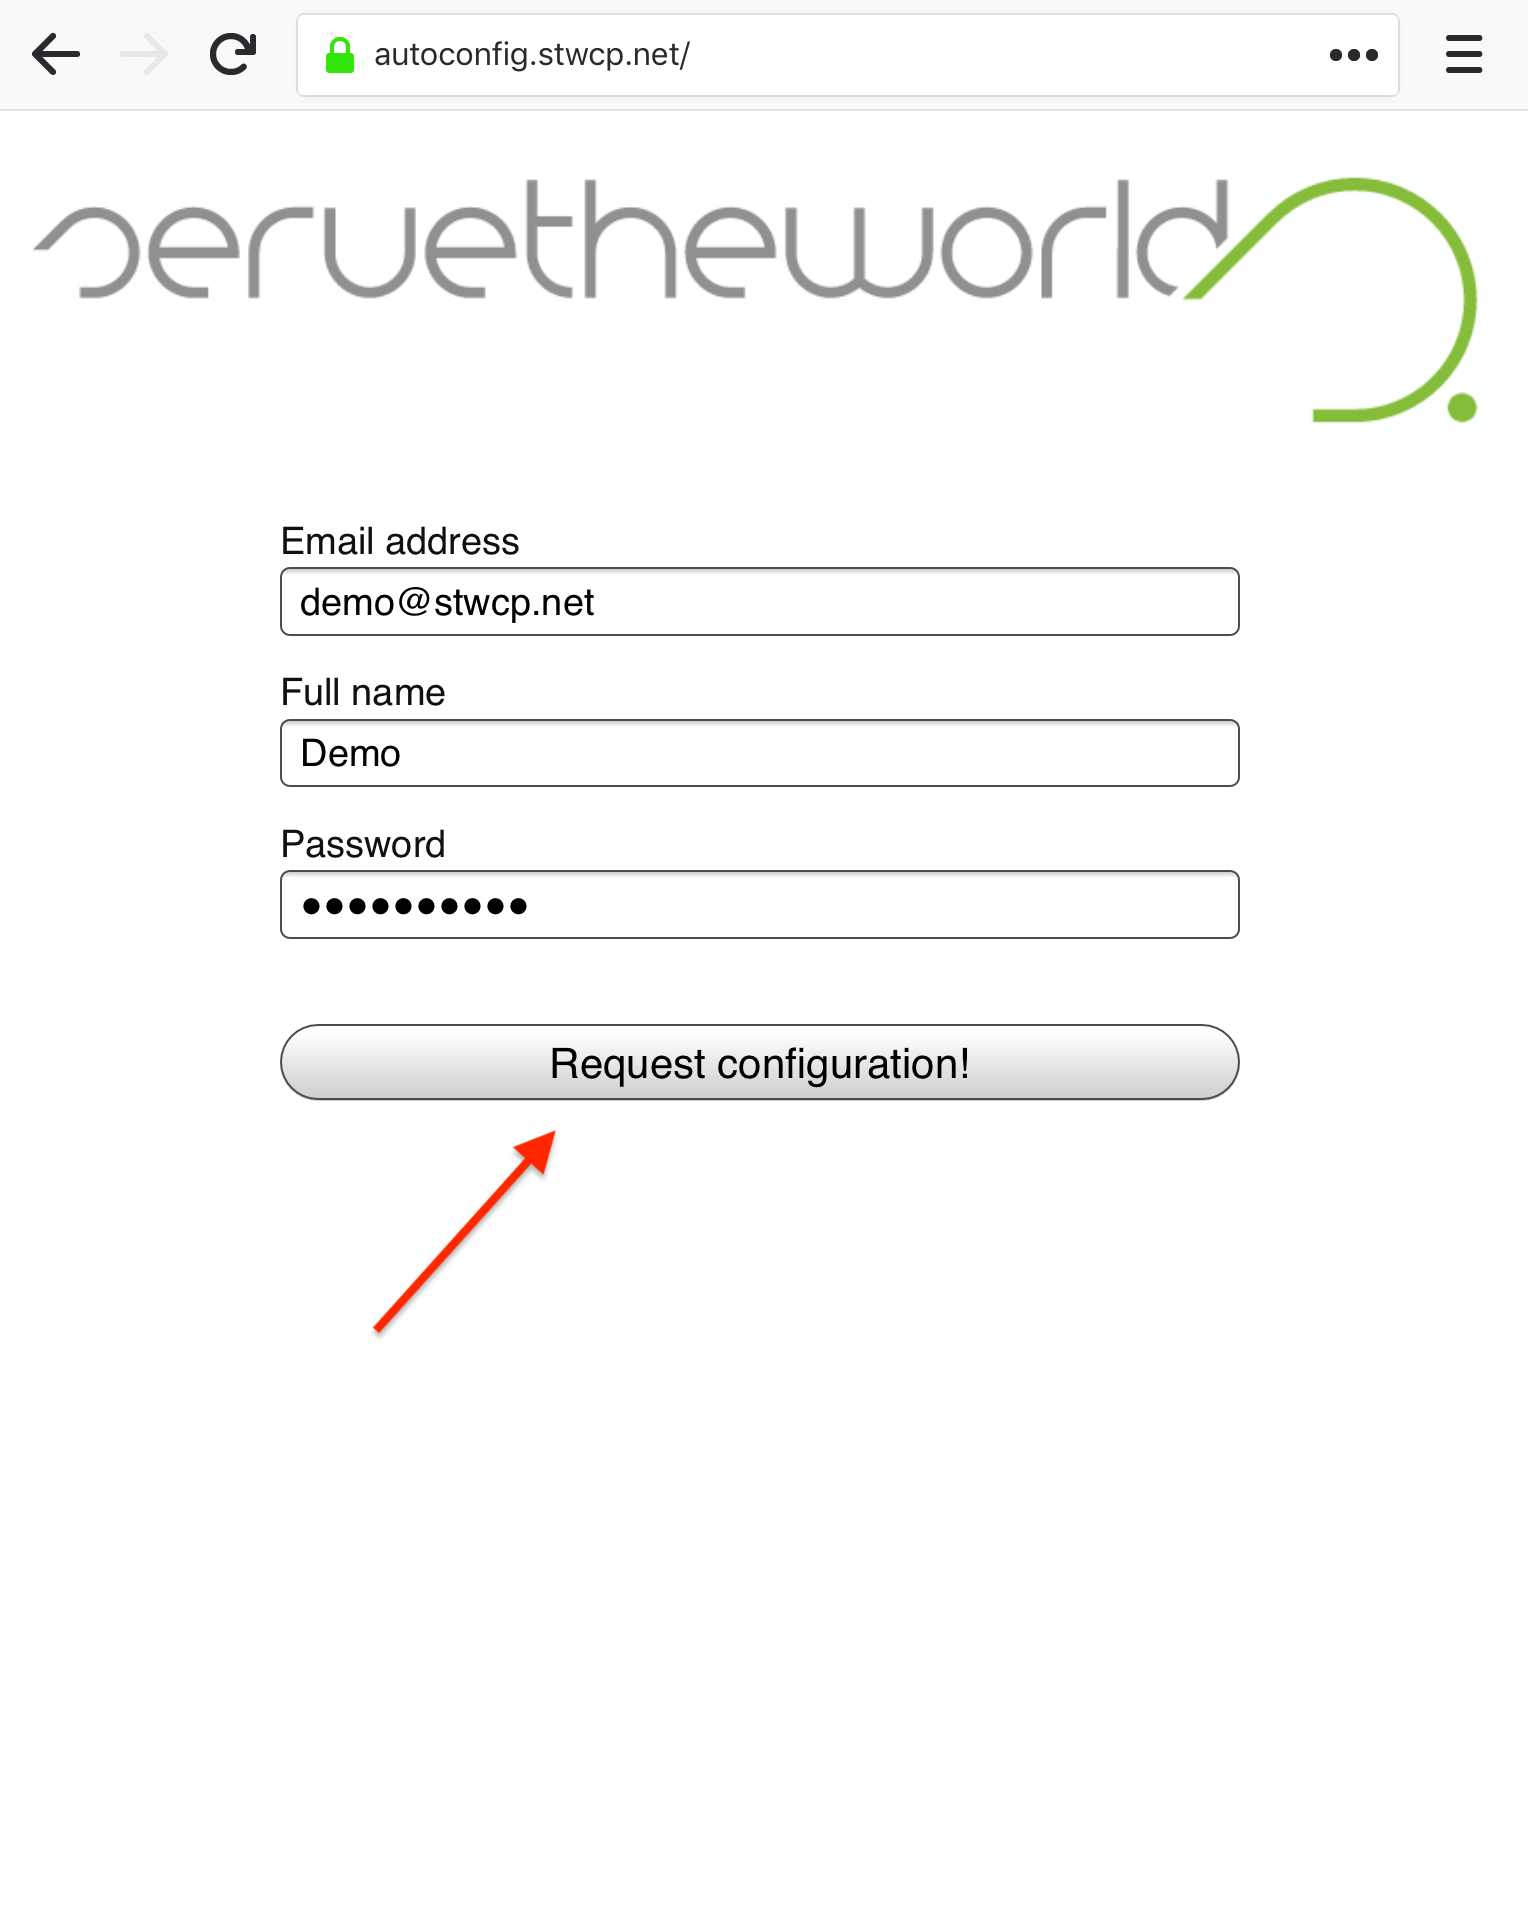
Open Safari Browser and go to https://autoconfig.stwcp.net/
Enter your email address, your name and password (the latter is optional in this step)
Click on REQUEST CONFIGURATION
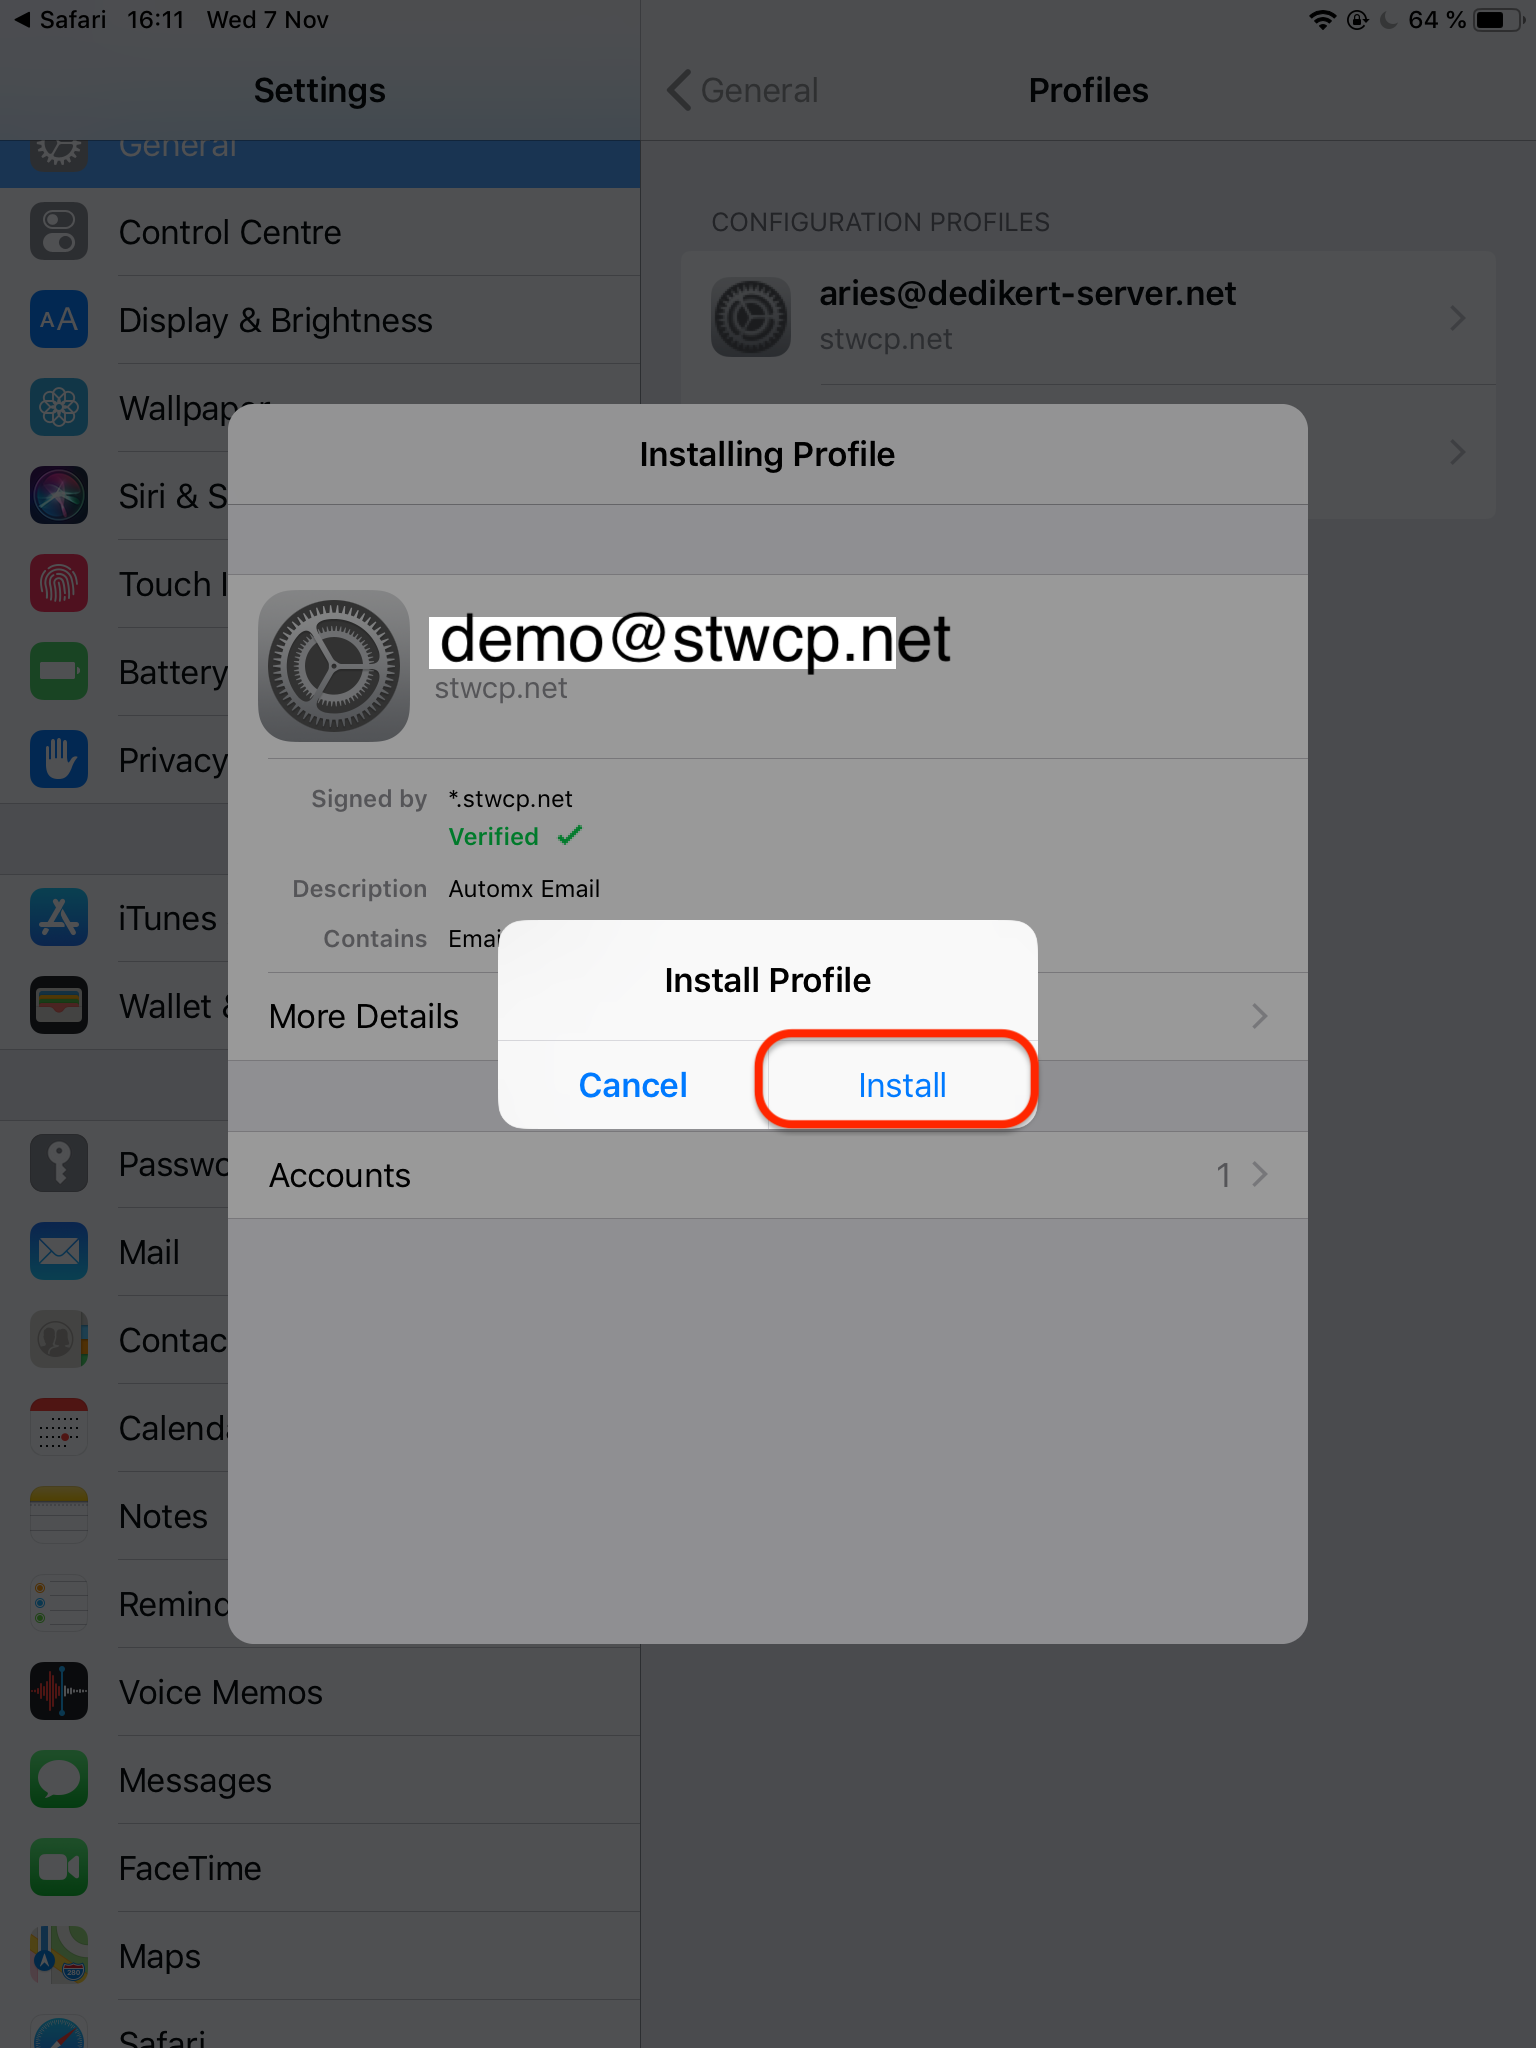
- You will be redirected to new image to install profile
 Click INSTALL
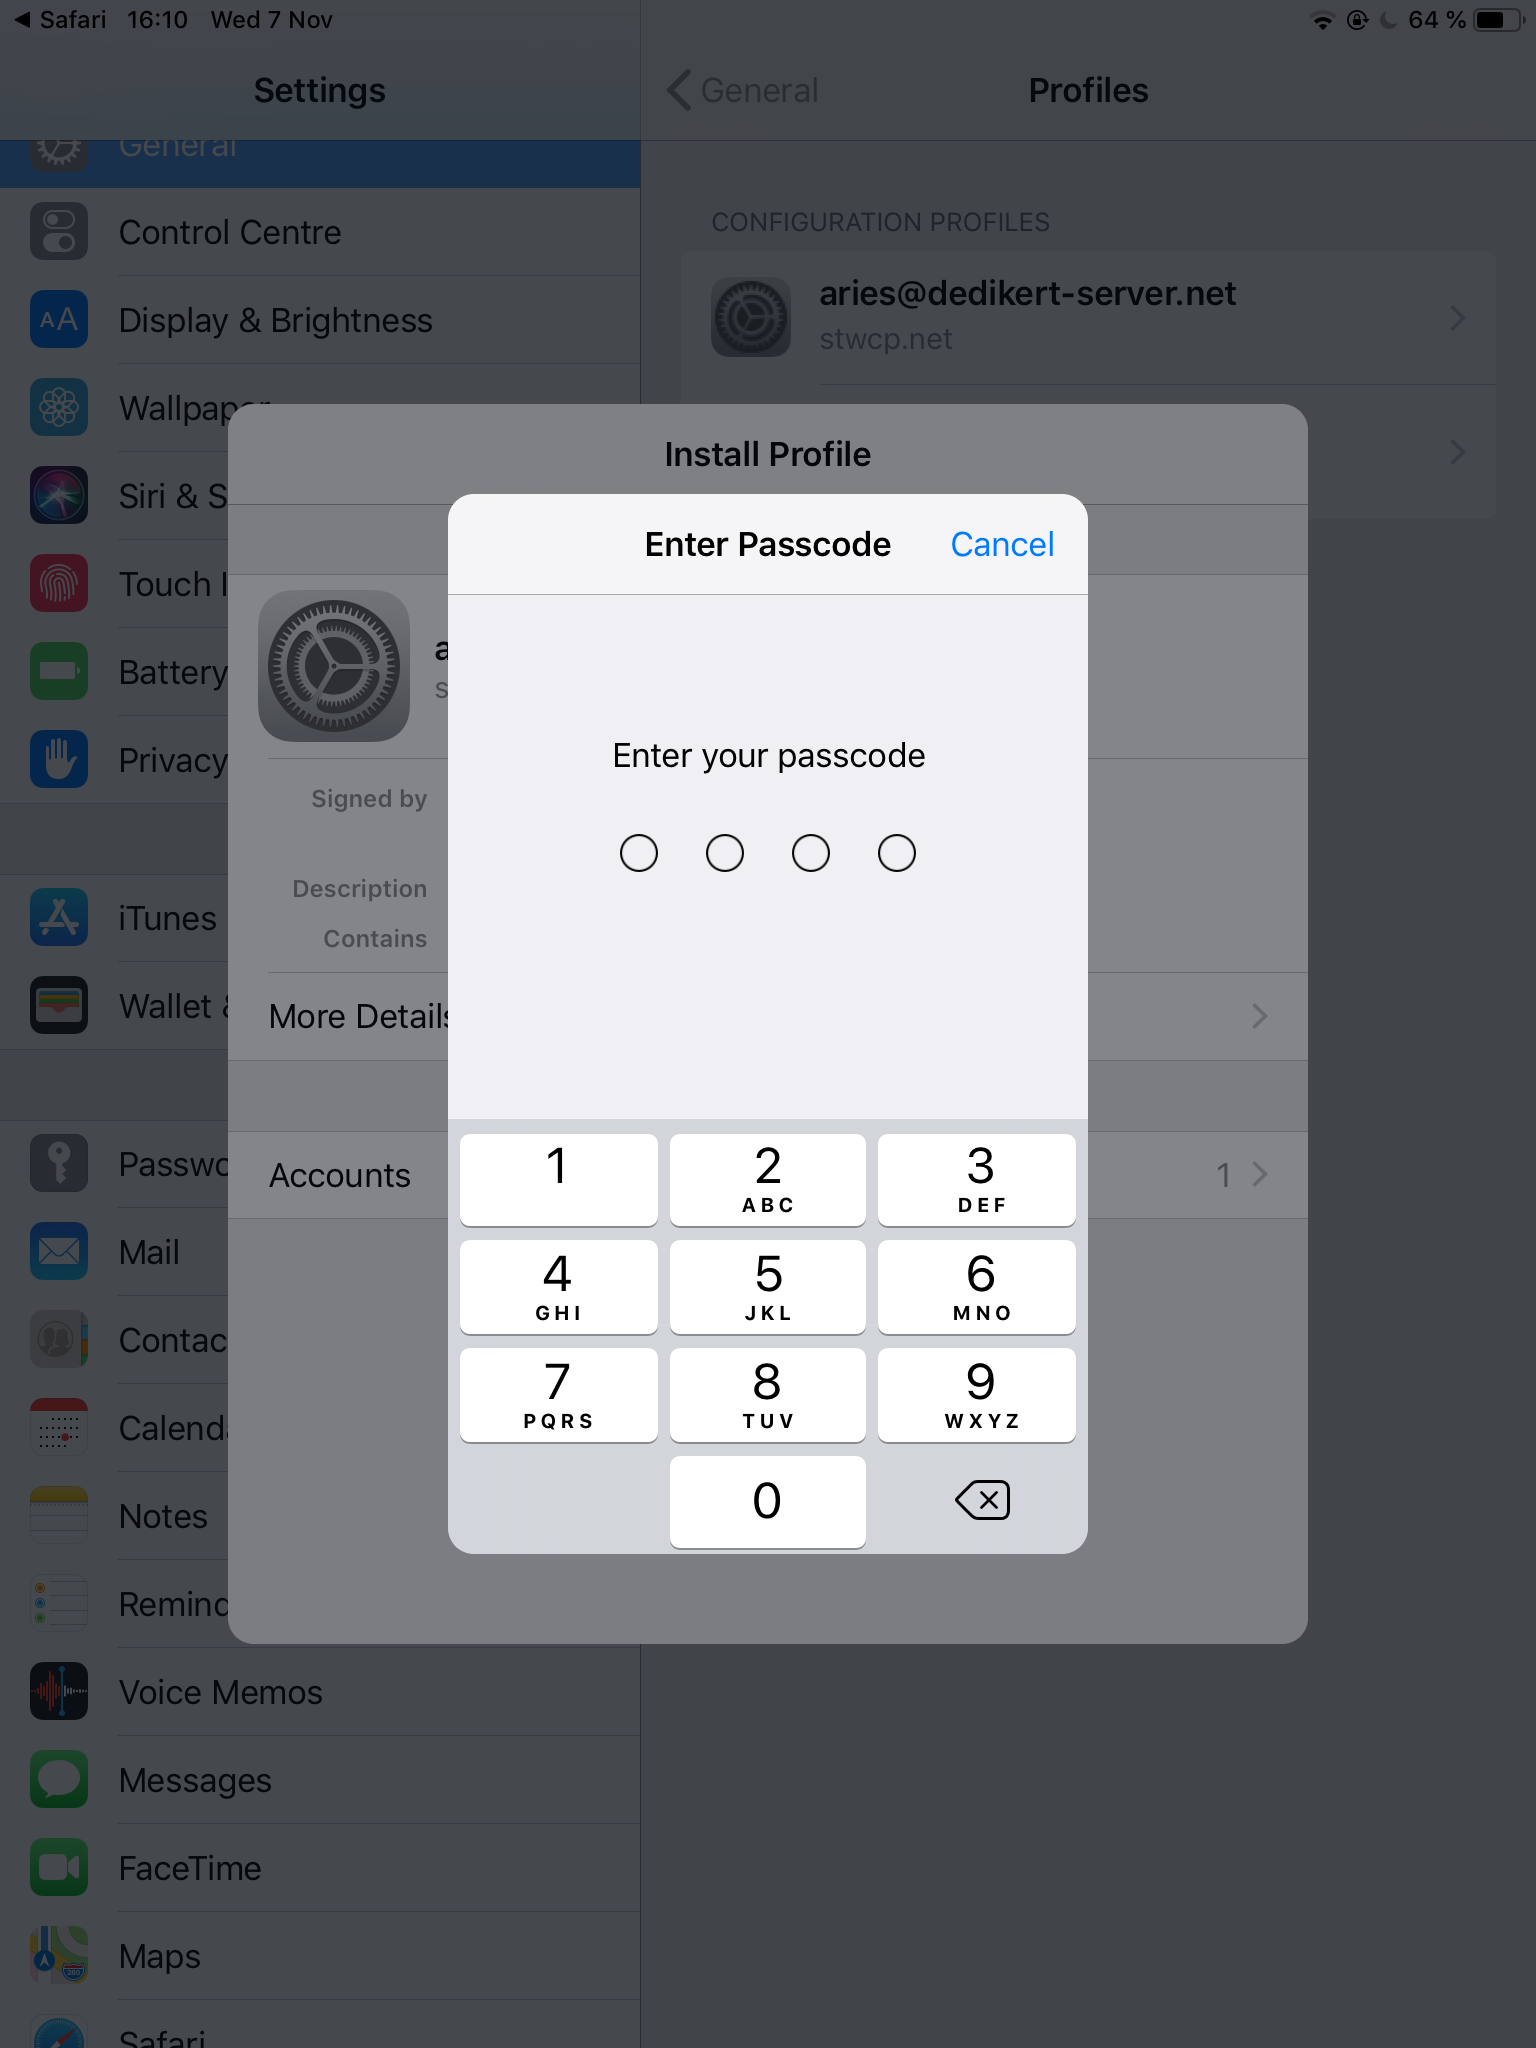
- Here you must enter the lock code to confirm the installation of the profile
Click on INSTALLER again
 Enter the password for your incoming and outgoing server email account and select Next
Click Finished to complete. Email is now ready for use in the iPhone / iPad mail application
Manual setup on iPad / iPhone based on IMAP
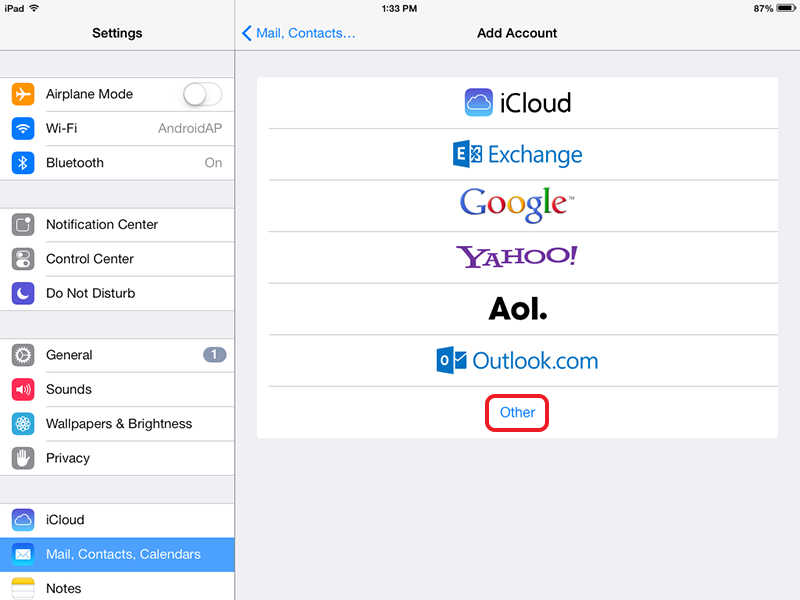
1) Open Settings and go to Mail, Contacts, Calendars
2) Select Add Account and then Other Select Add Email Account
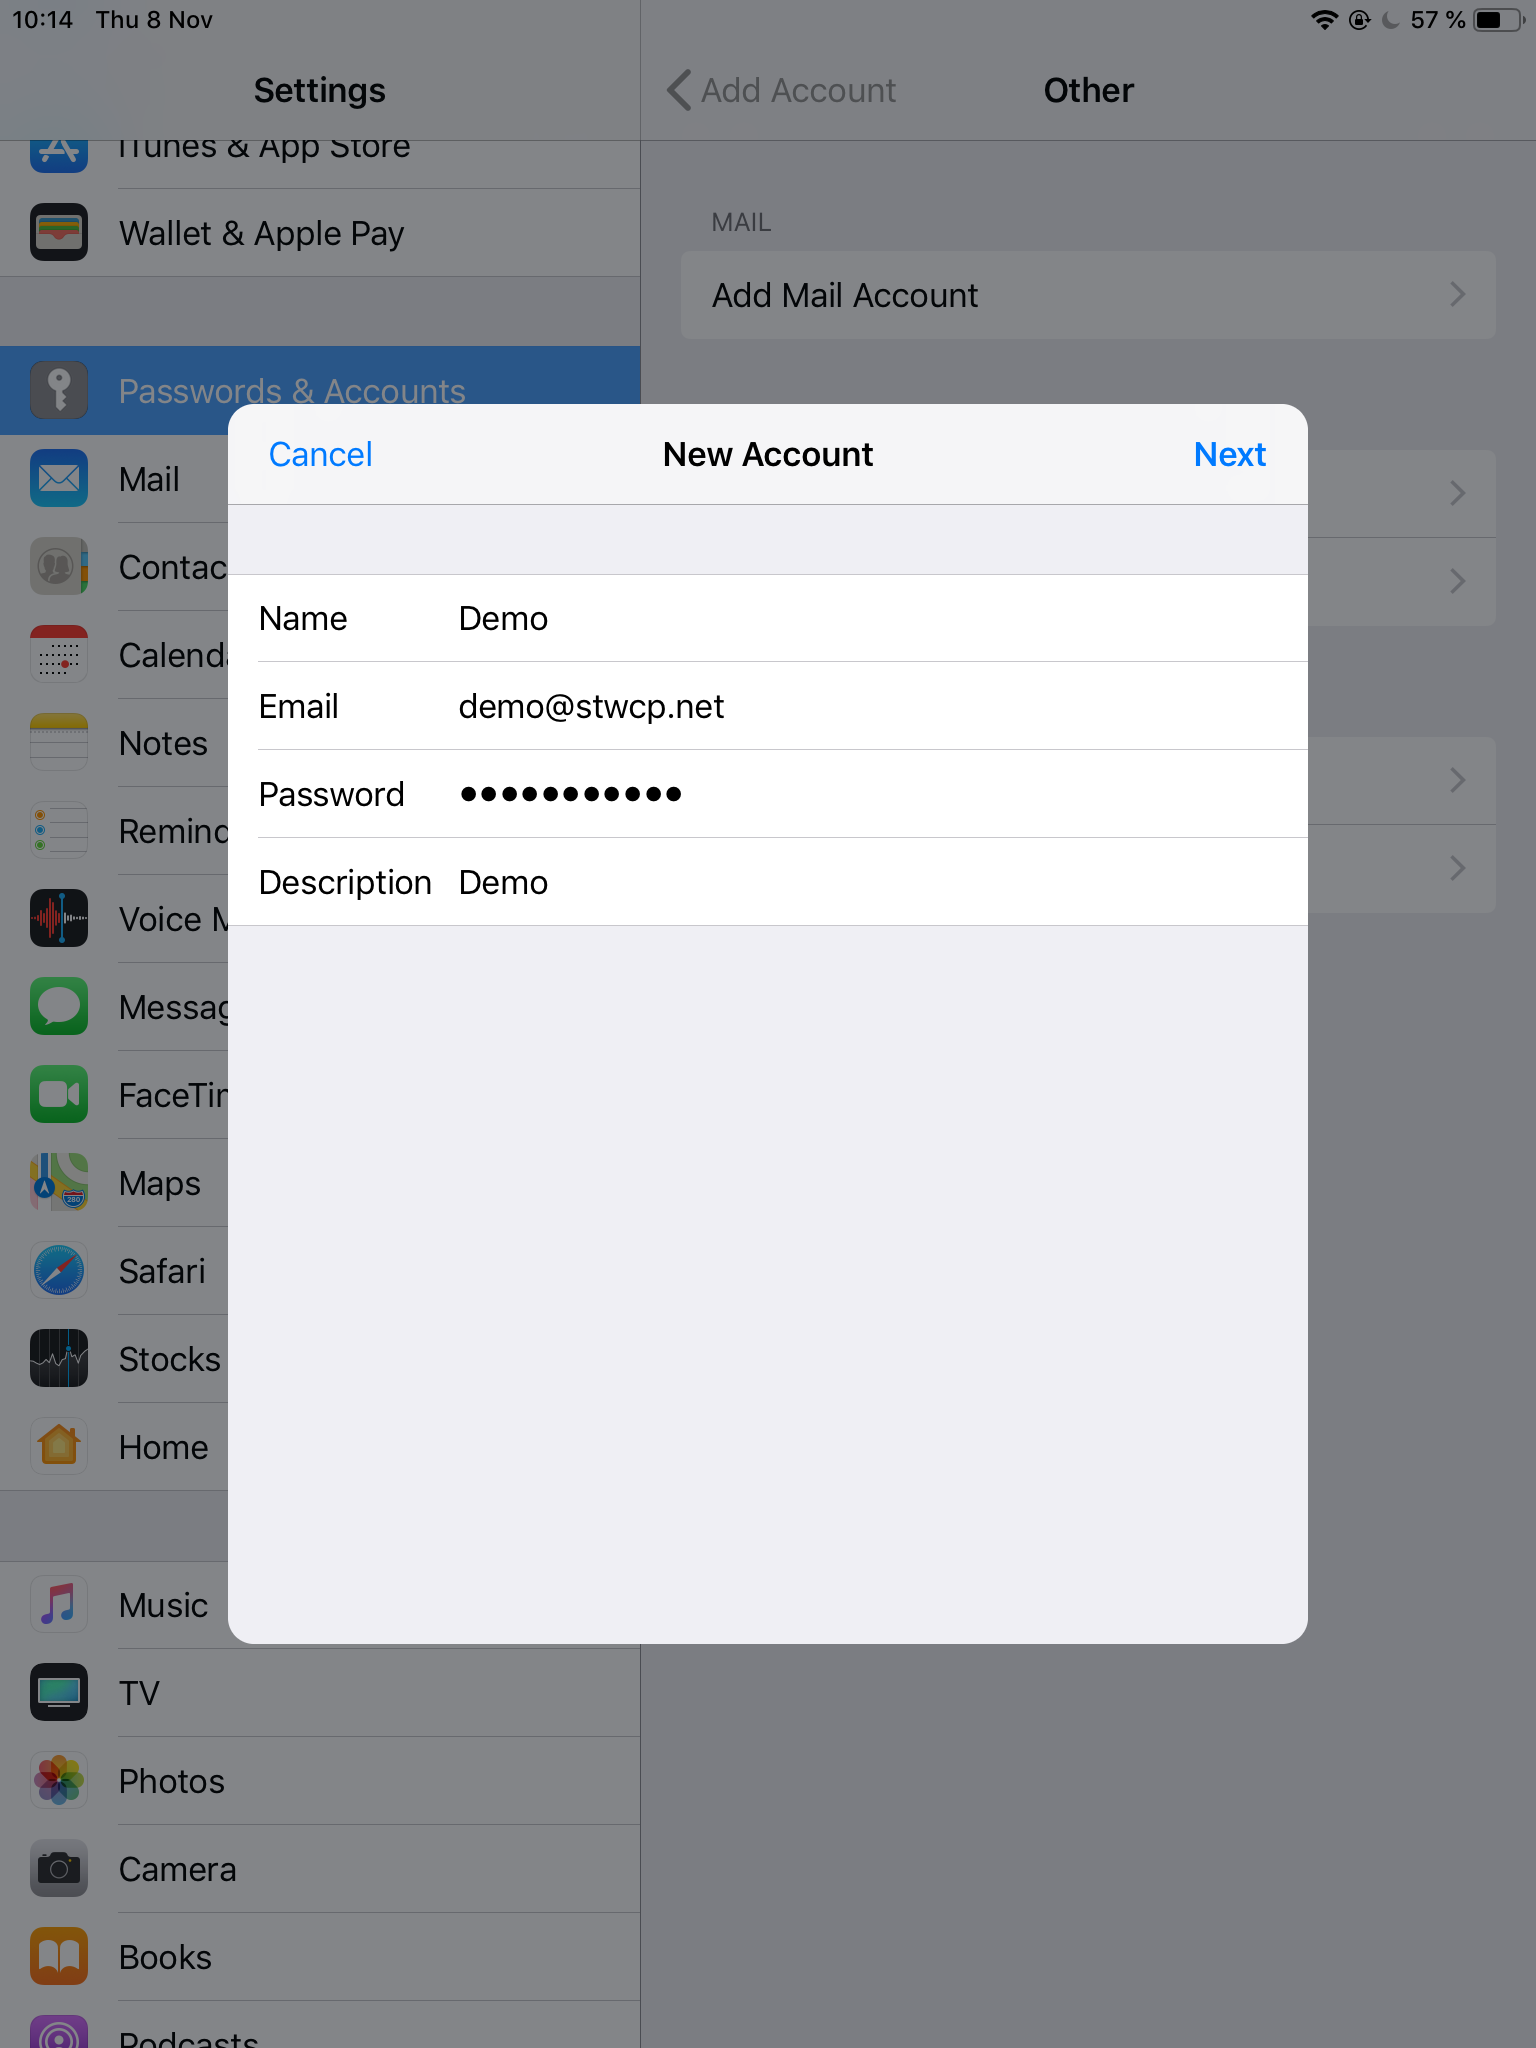
 3) Fill out fields with your own information for your email account
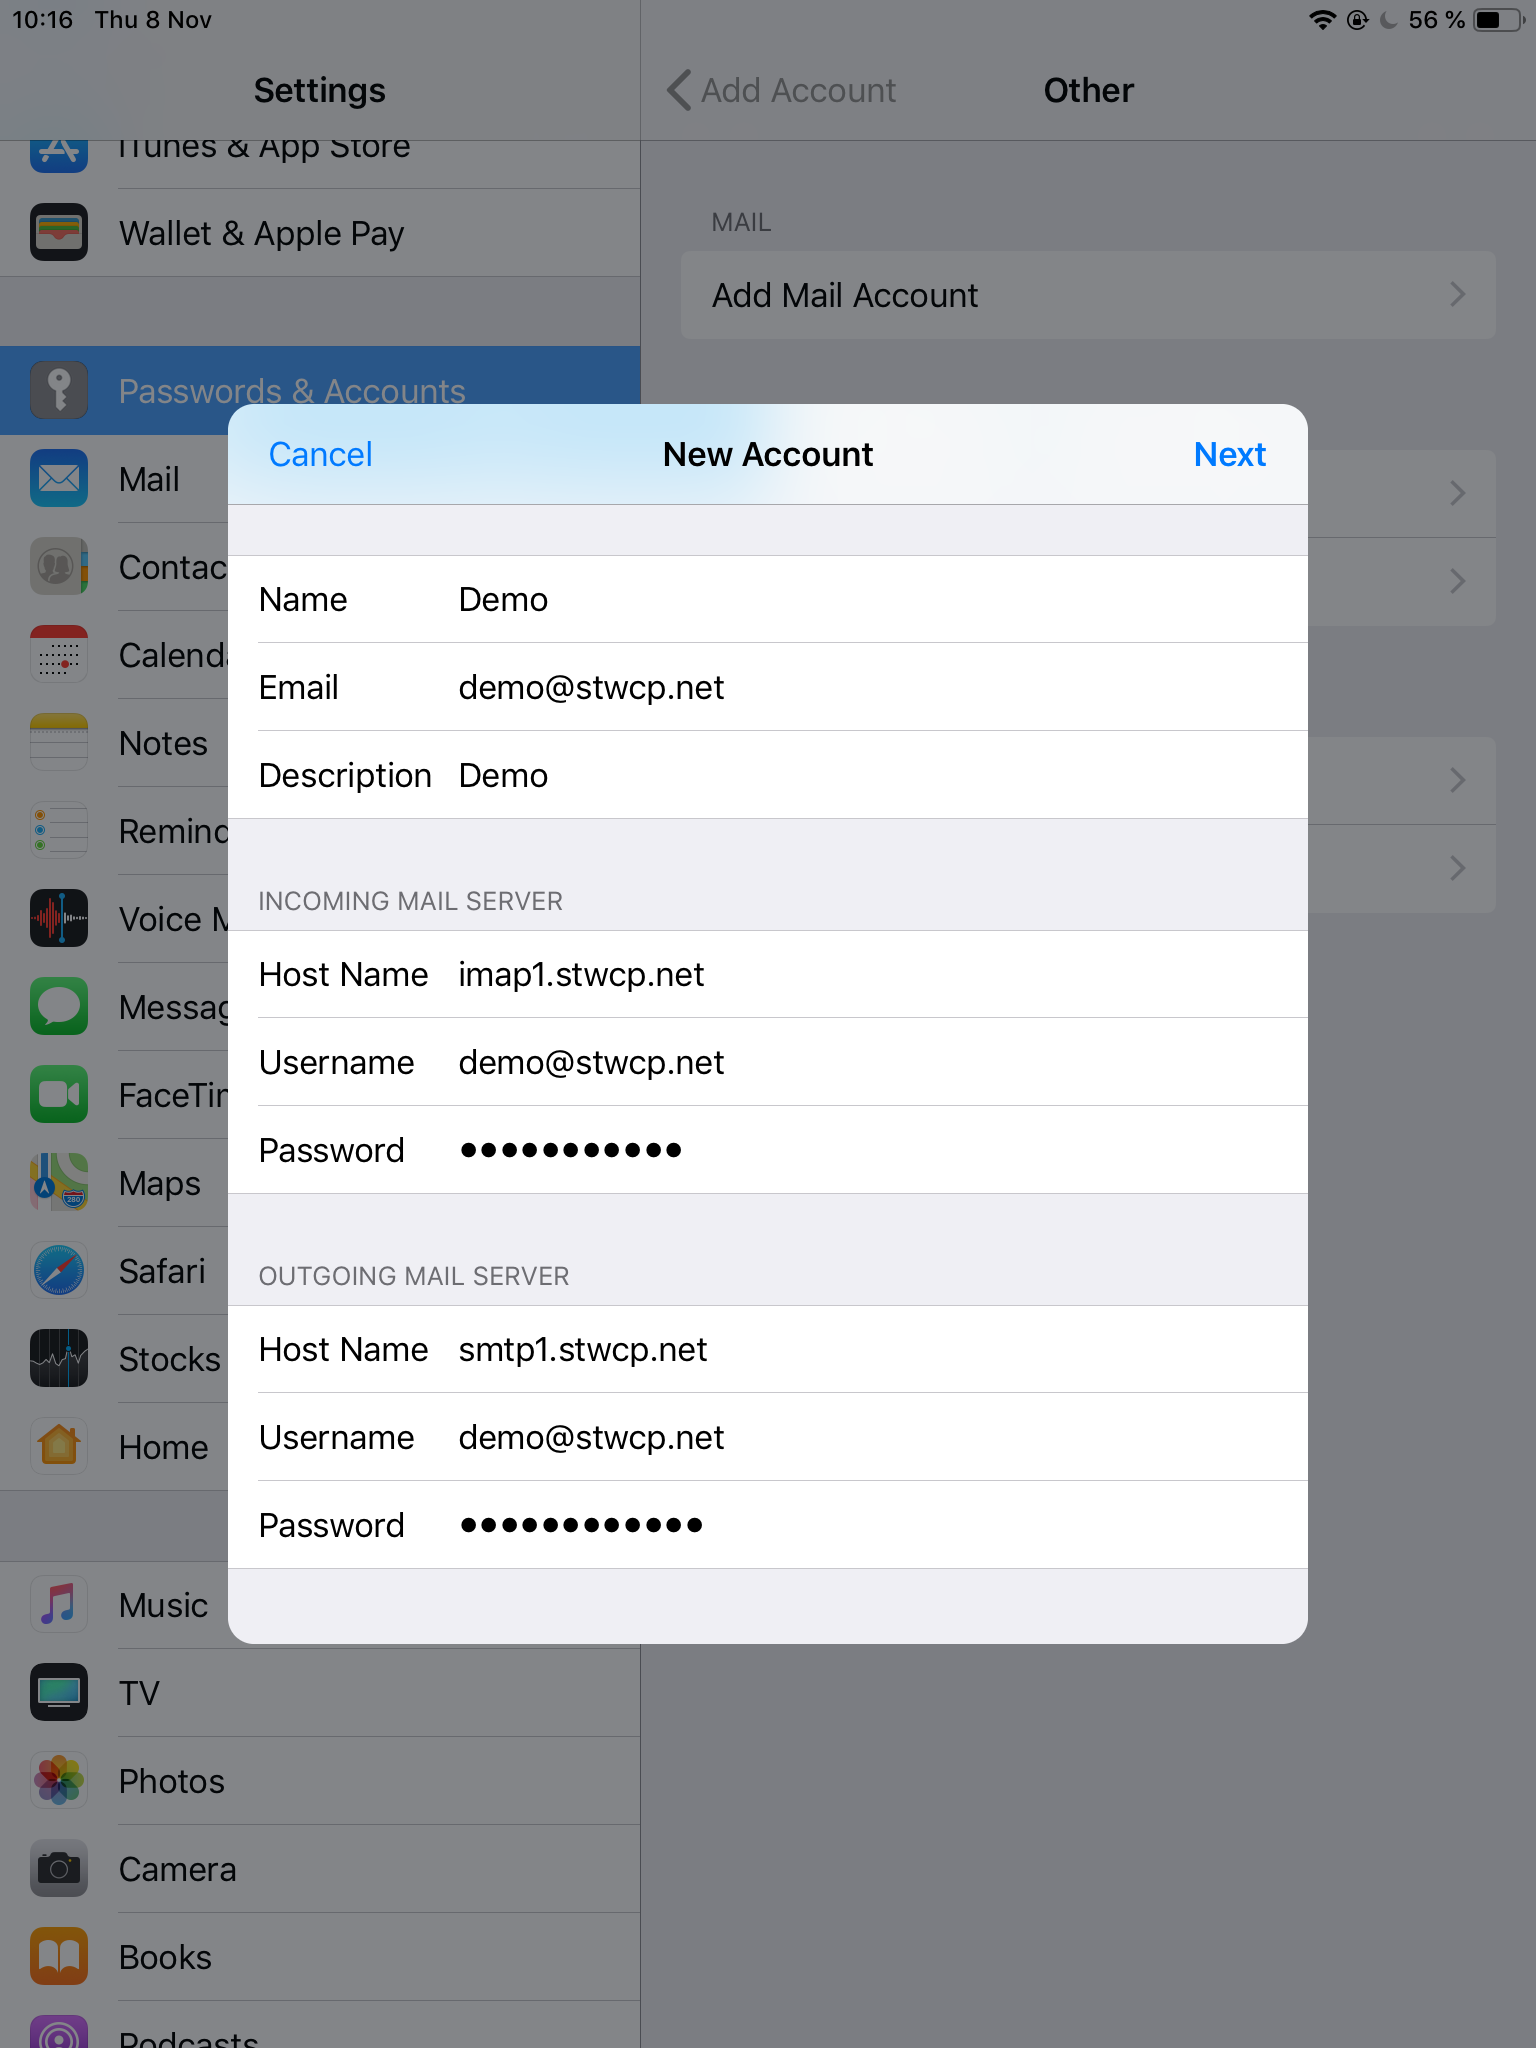
 4) Fill out information for incoming mail server and outgoing mail server
 5) Select Next and then Archive. Your email account is now ready for use
Troubleshoot and change settings for existing email account
Incoming settings
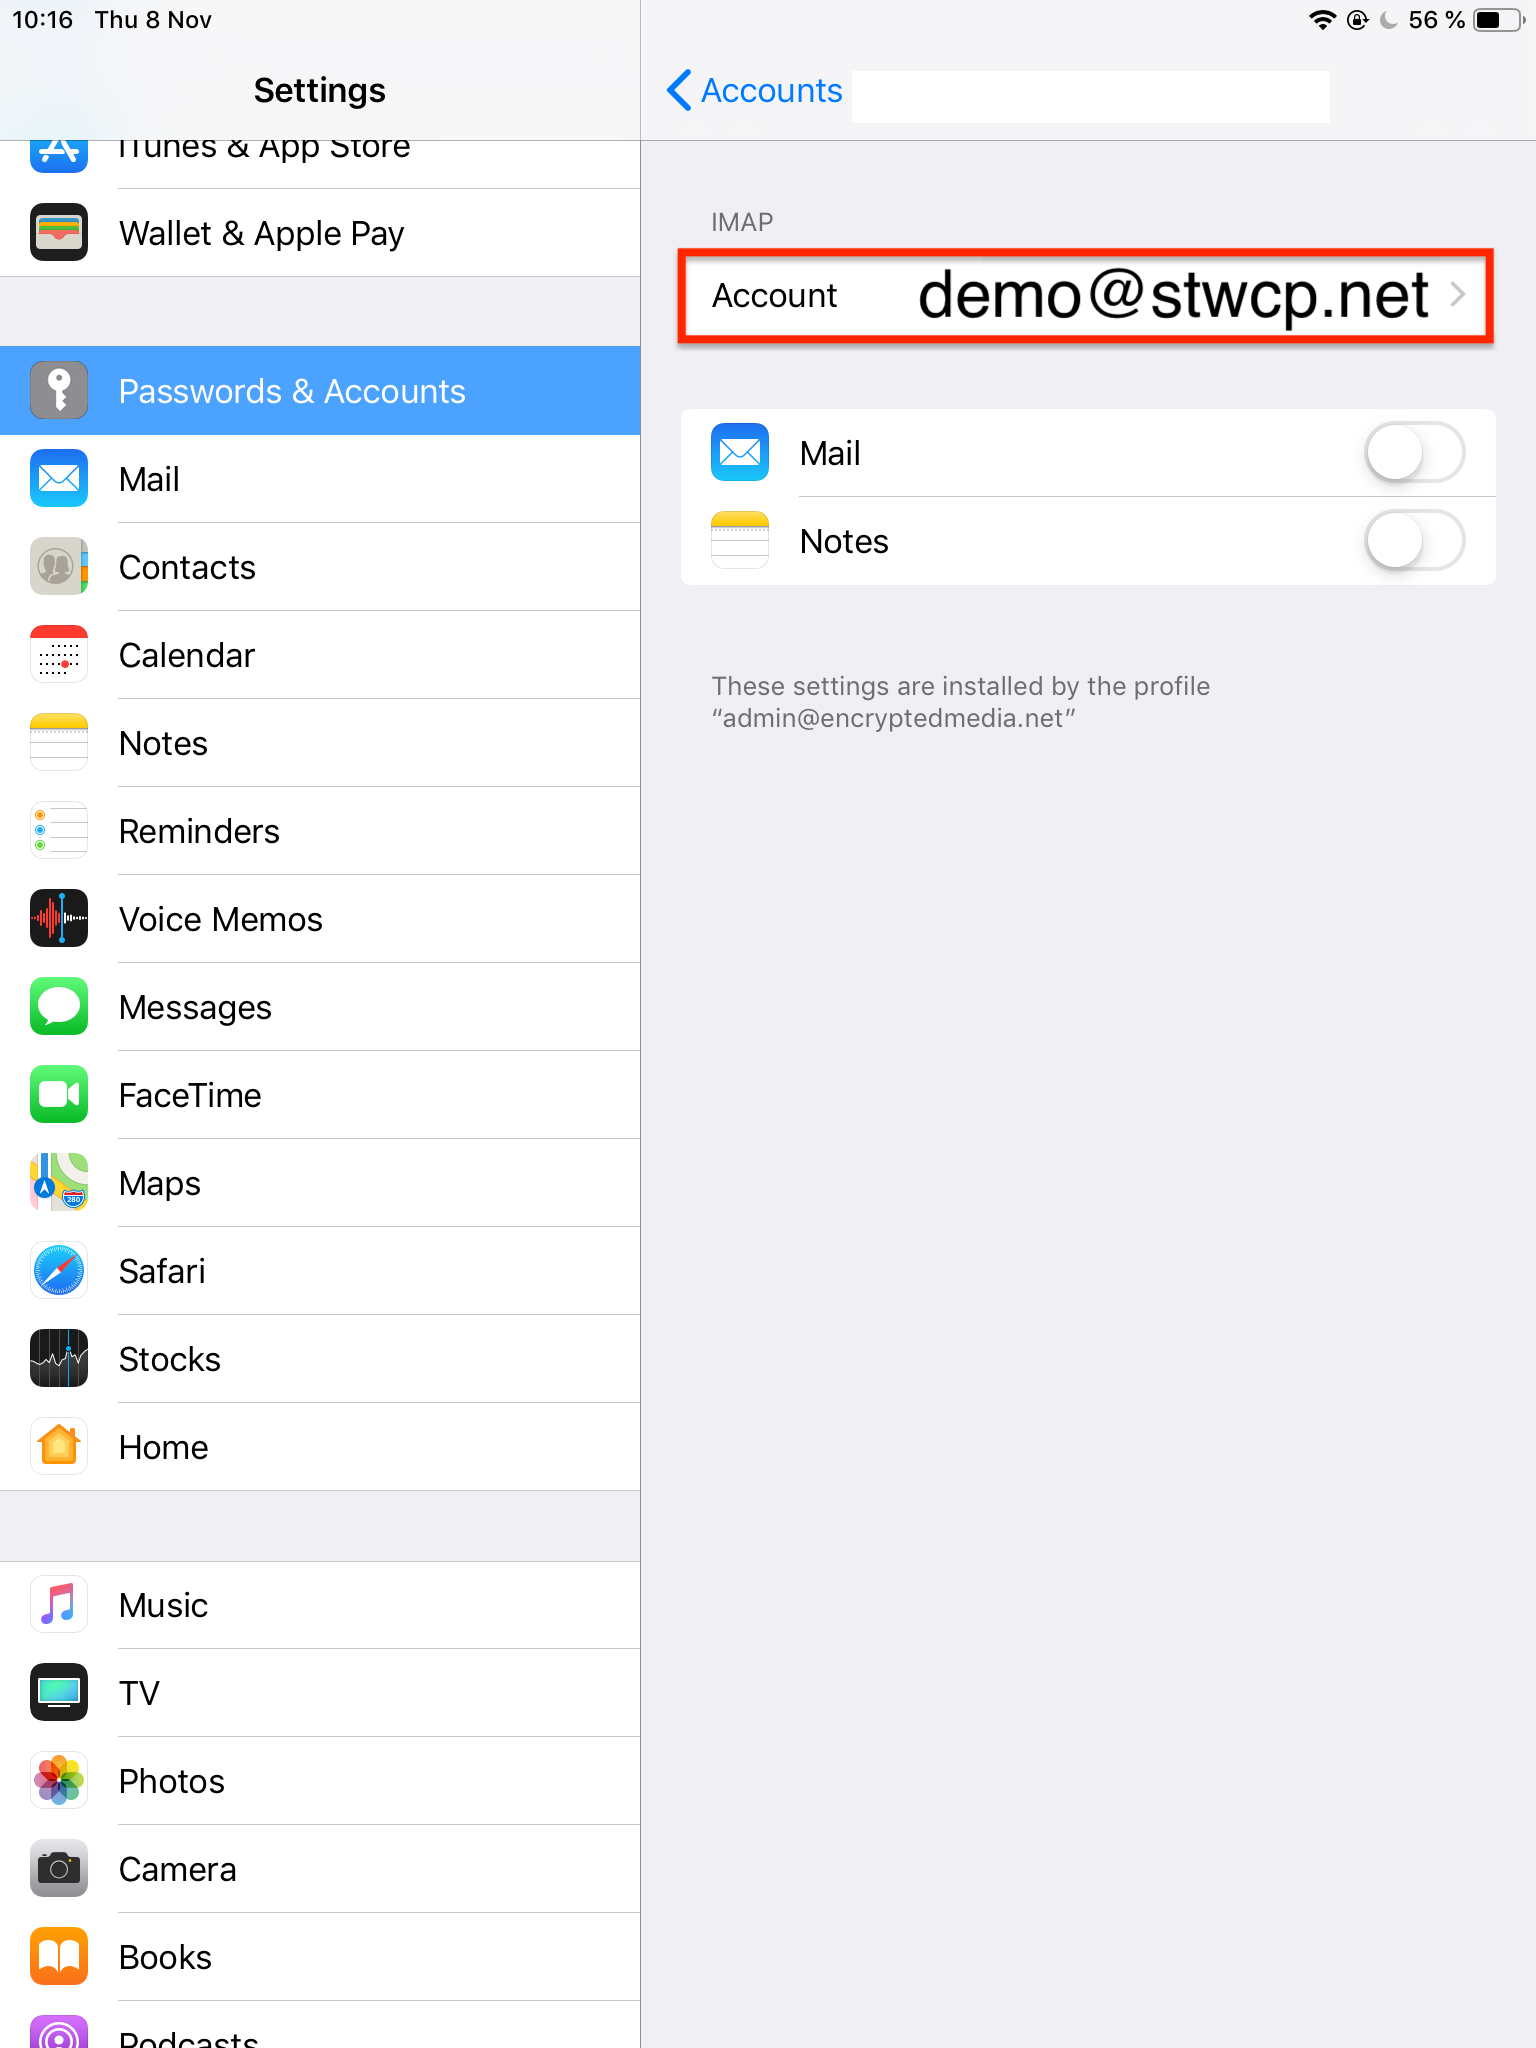
1) Open Settings and select Mail, Contacts, Calendars
2) If you have multiple email accounts on the iPad, make sure to select the current email account to be troubled.
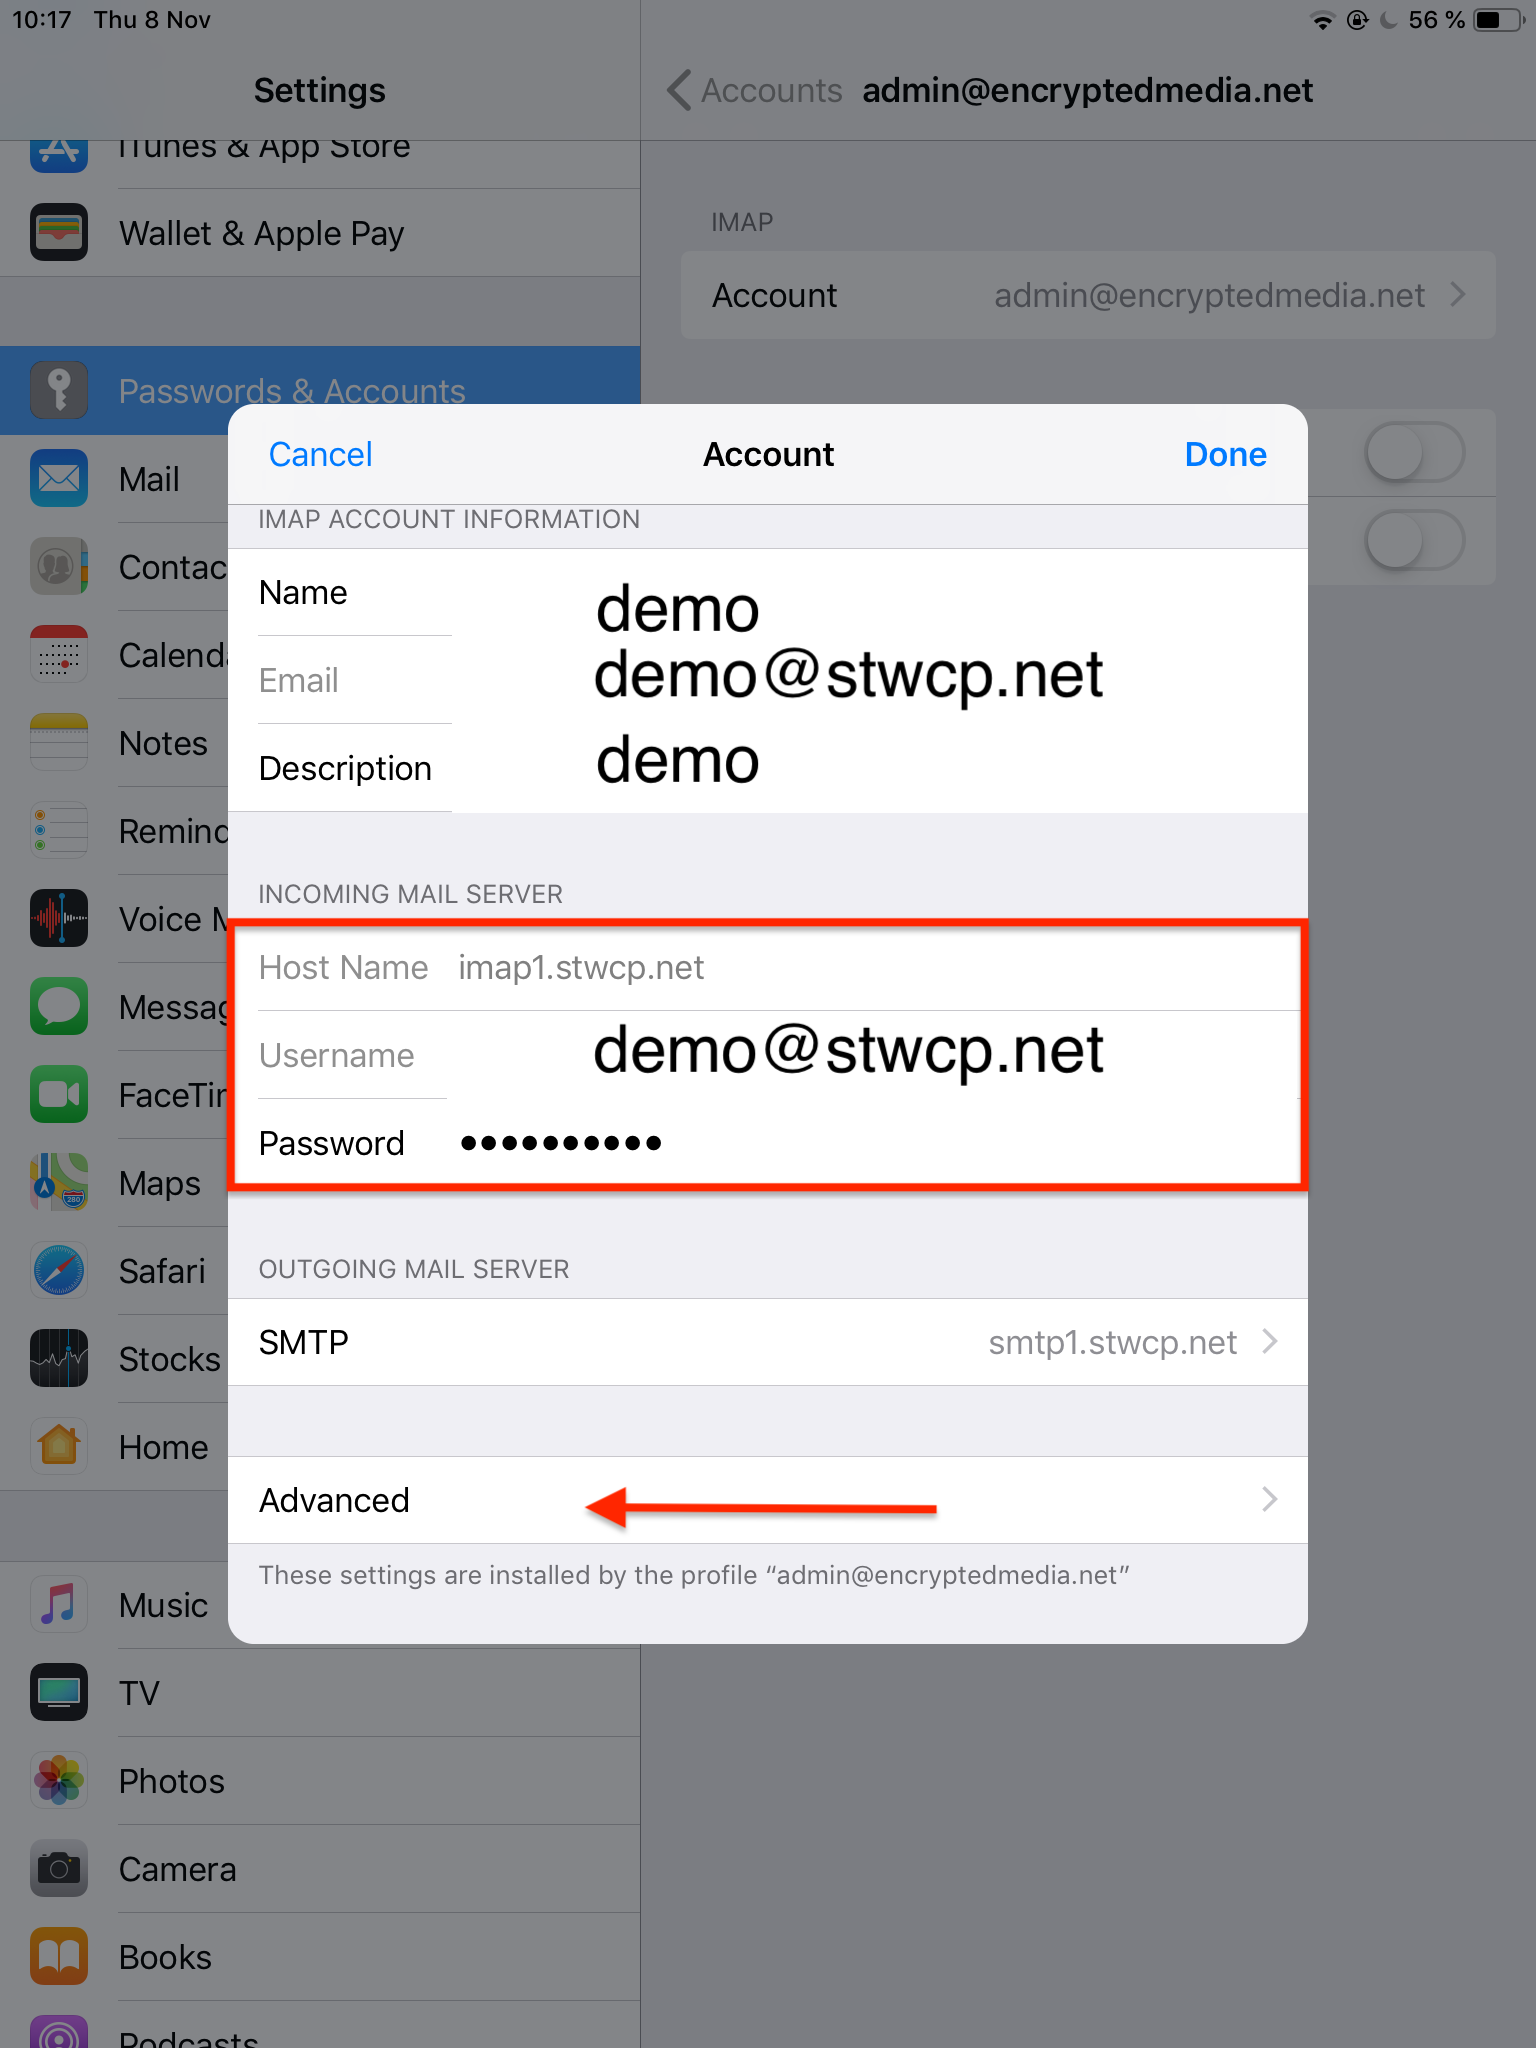
 3) Make sure the host name / mail server name for incoming mail server is correct (see picture below)
- Make sure that the username and password are correct. Please try again
4) Click on the Advanced field (see picture below)
 5) Click the Advanced field (see picture below)
- Please copy the settings below with your device
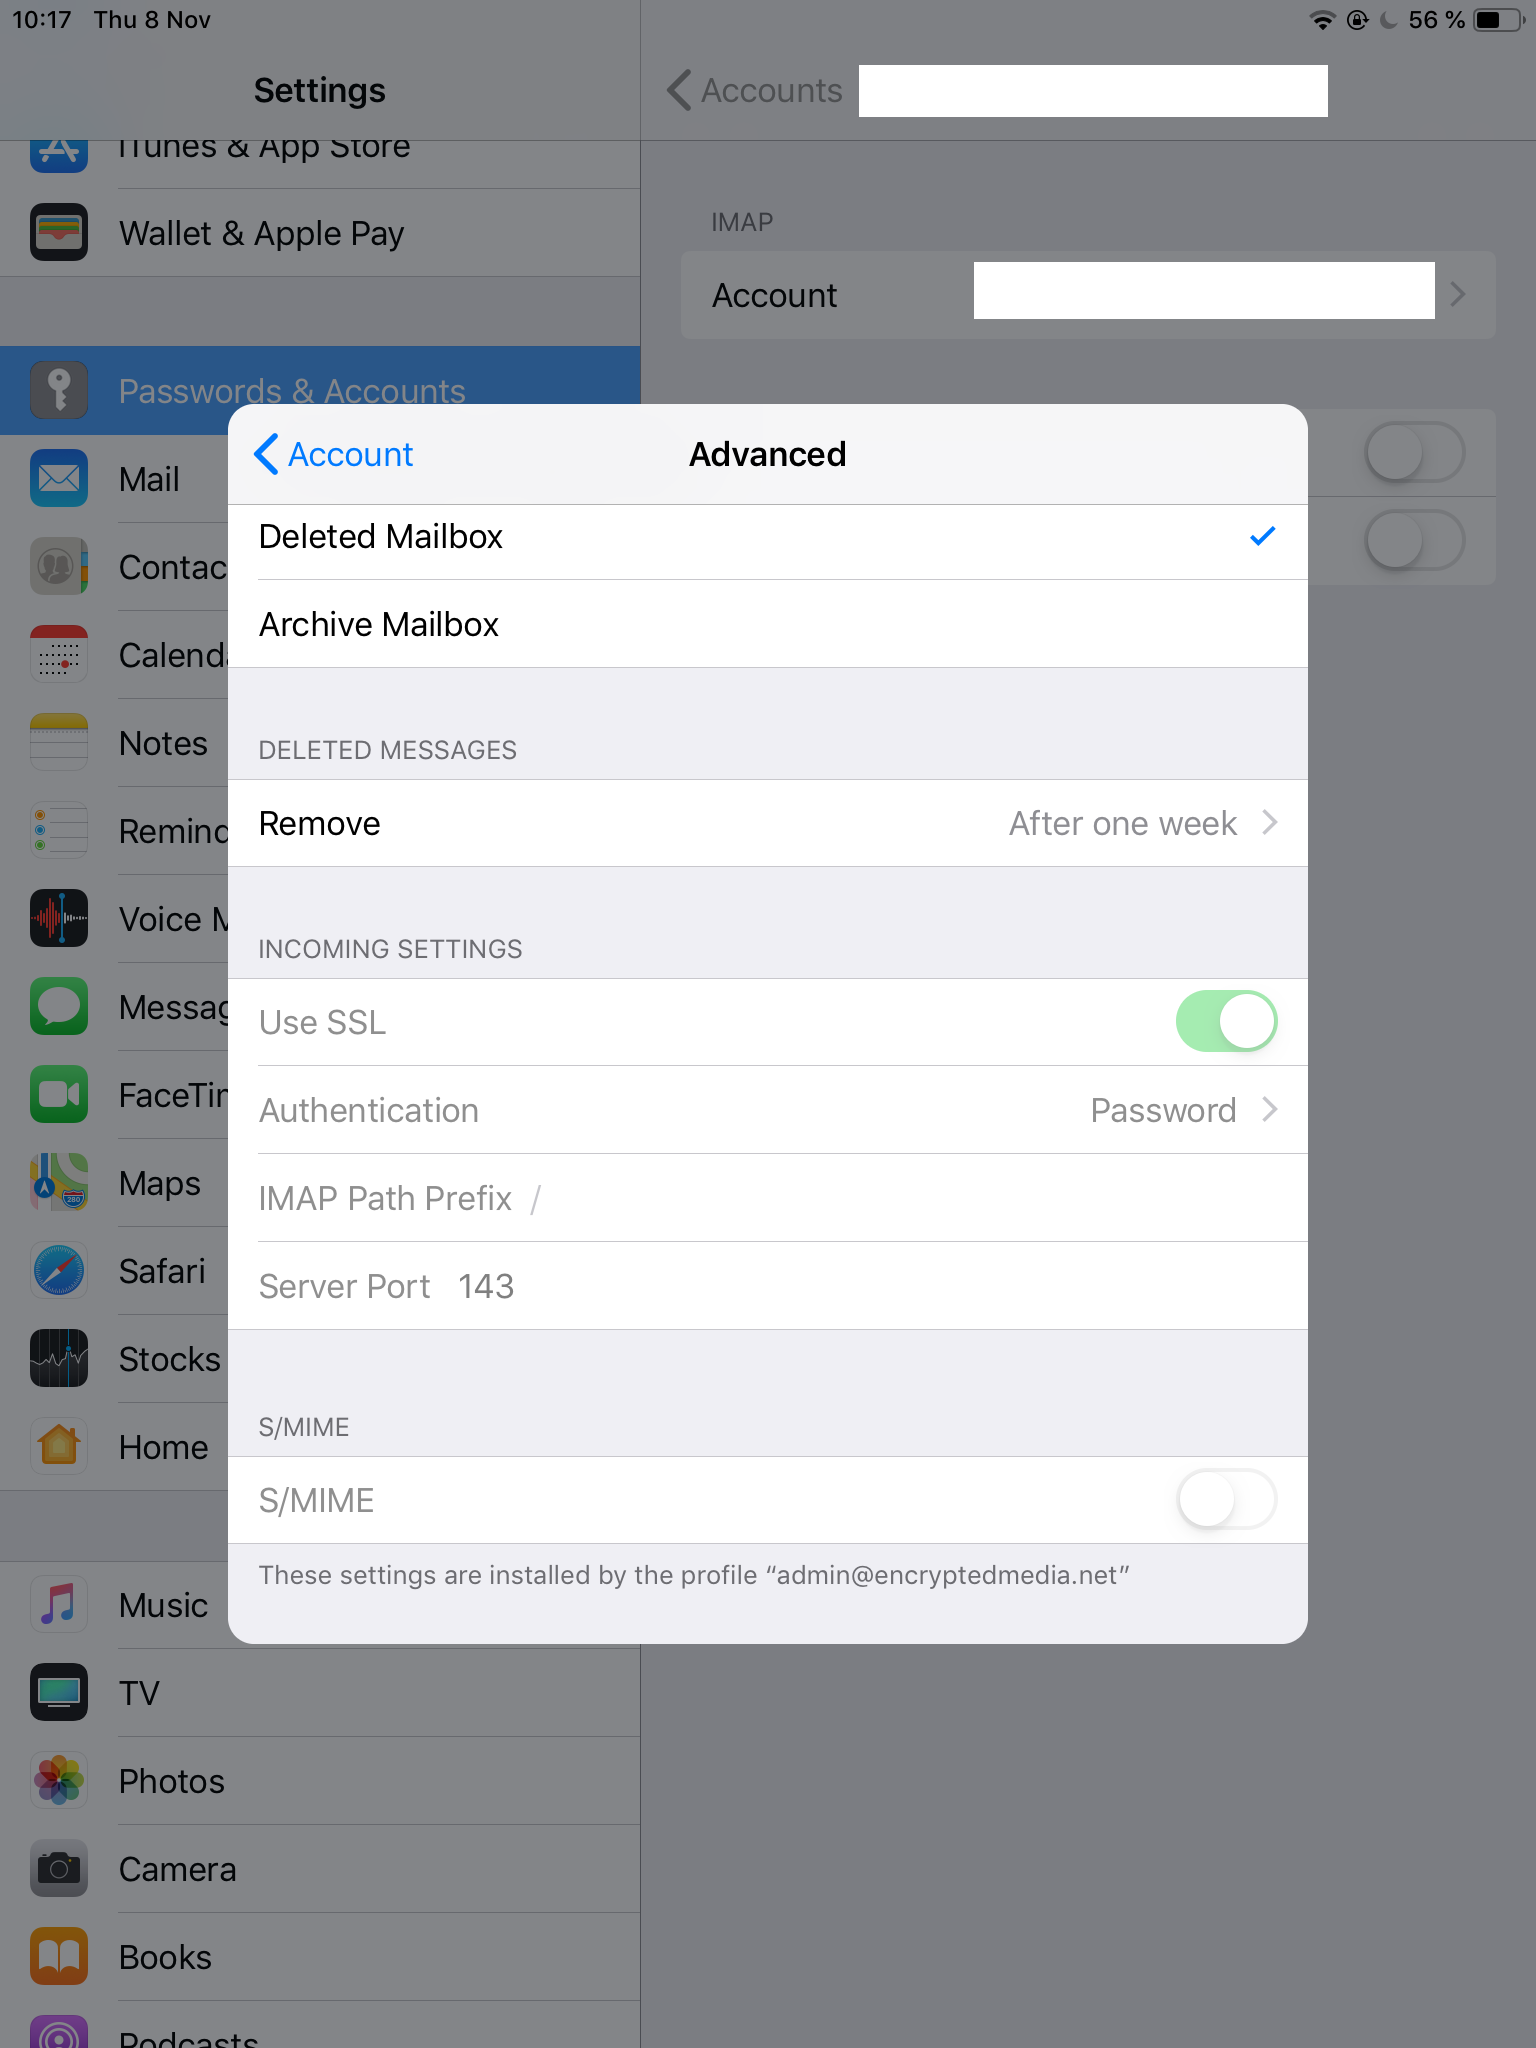 6) Return by clicking Account, and then click Finished
Outgoing settings
1) Open Settings, and select Mail, Contacts, Calendars
2) If you have multiple email accounts on the iPad, make sure to select the current email account to be troubled.
3) See the field for Outbound mail server and click SMTP
4) Click Primary Server
- Make sure the host name / mail server is correct. This is smtp1.stwcp.net
- Make sure that the username and password are correct. Please try again
- Use SSL can be turned on
- Approval is set to password
- Serversport is set to 587
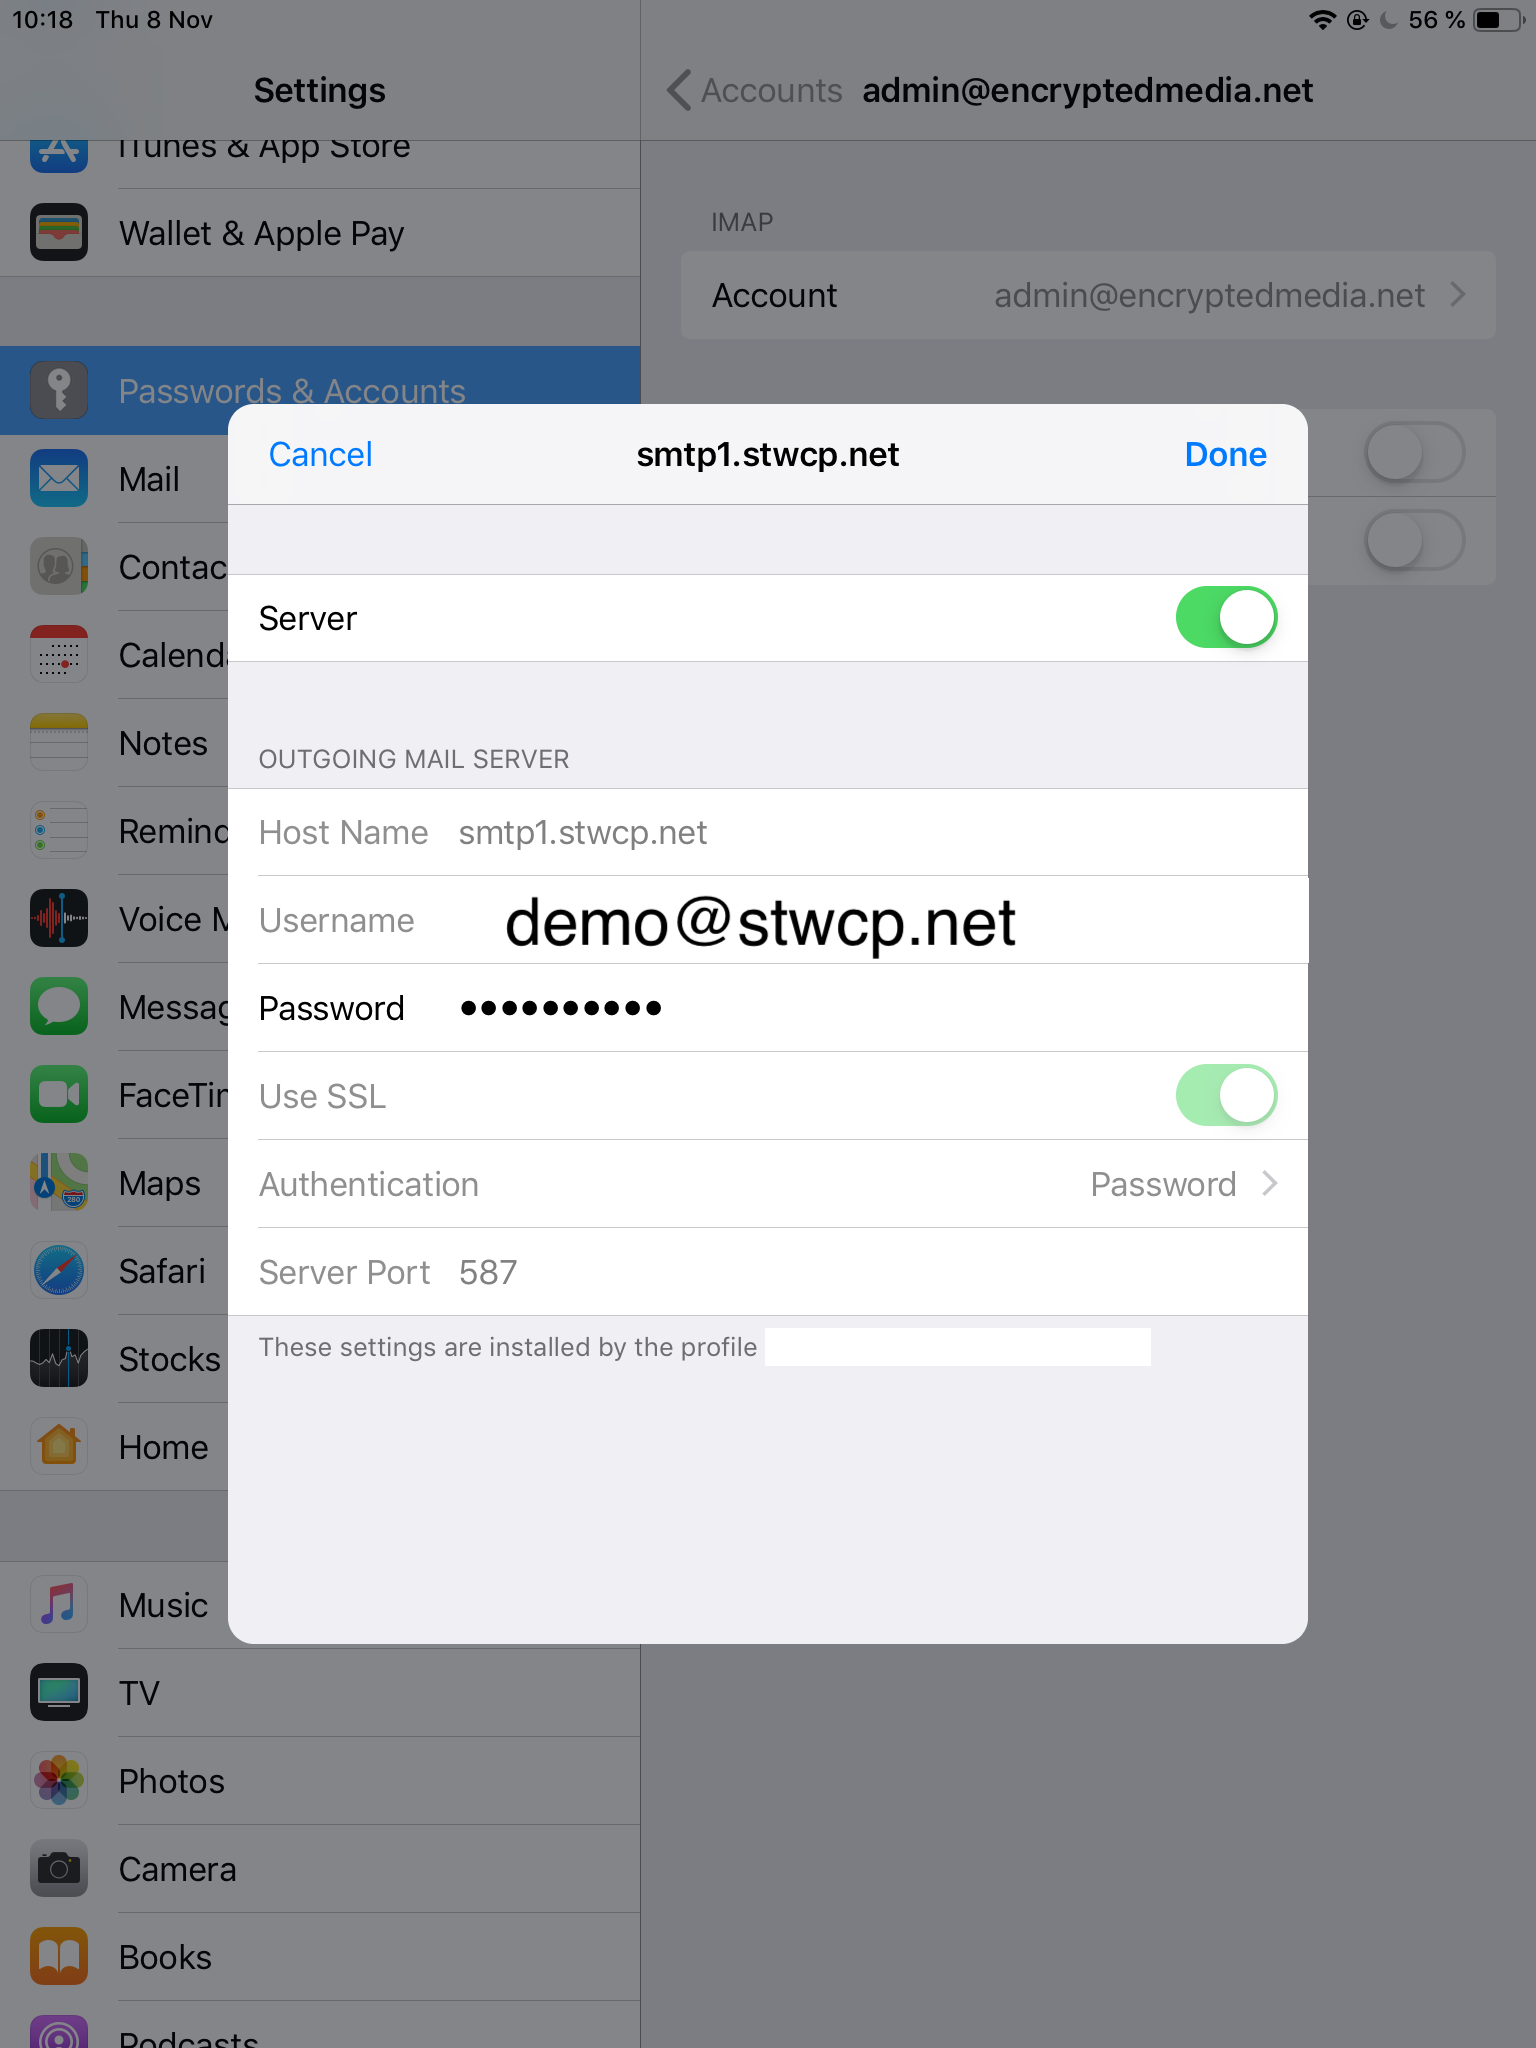 5) Select Done - Settings are now verified, if all is OK, you can now try to send an email.