DNS
Here you will find answers to the most common questions related to DNS administration.
ServeTheWorld has a dedicated DNS section in the control panel, separate to domains. This allows you to manage your DNS records independently of your hosting account, so they stay in one place even if you move between servers or change your hosting plan.
You can also prepare changes as drafts and review them before changes go live, roll back with a 90-day history, import and export a DNS zone, apply ready-made record templates, and run built-in diagnostics.
If DNS is new to you, DNS Fundamentals explains how domain names, IP addresses, lookups, and authoritative answers fit together.
- Where can I find DNS administration?
- Open a zone and read the records
- Add or change a DNS record
- Review and publish your changes
- Undo a change you have not published
- Examples of creating or changing DNS records
- Forward a domain to another web address
- Point your domain at a service with a template
- Back up or move a zone
- Roll back a change with Time machine
- See who changed what with the audit log
- Check whether a change has taken effect
Where can I find DNS administration?
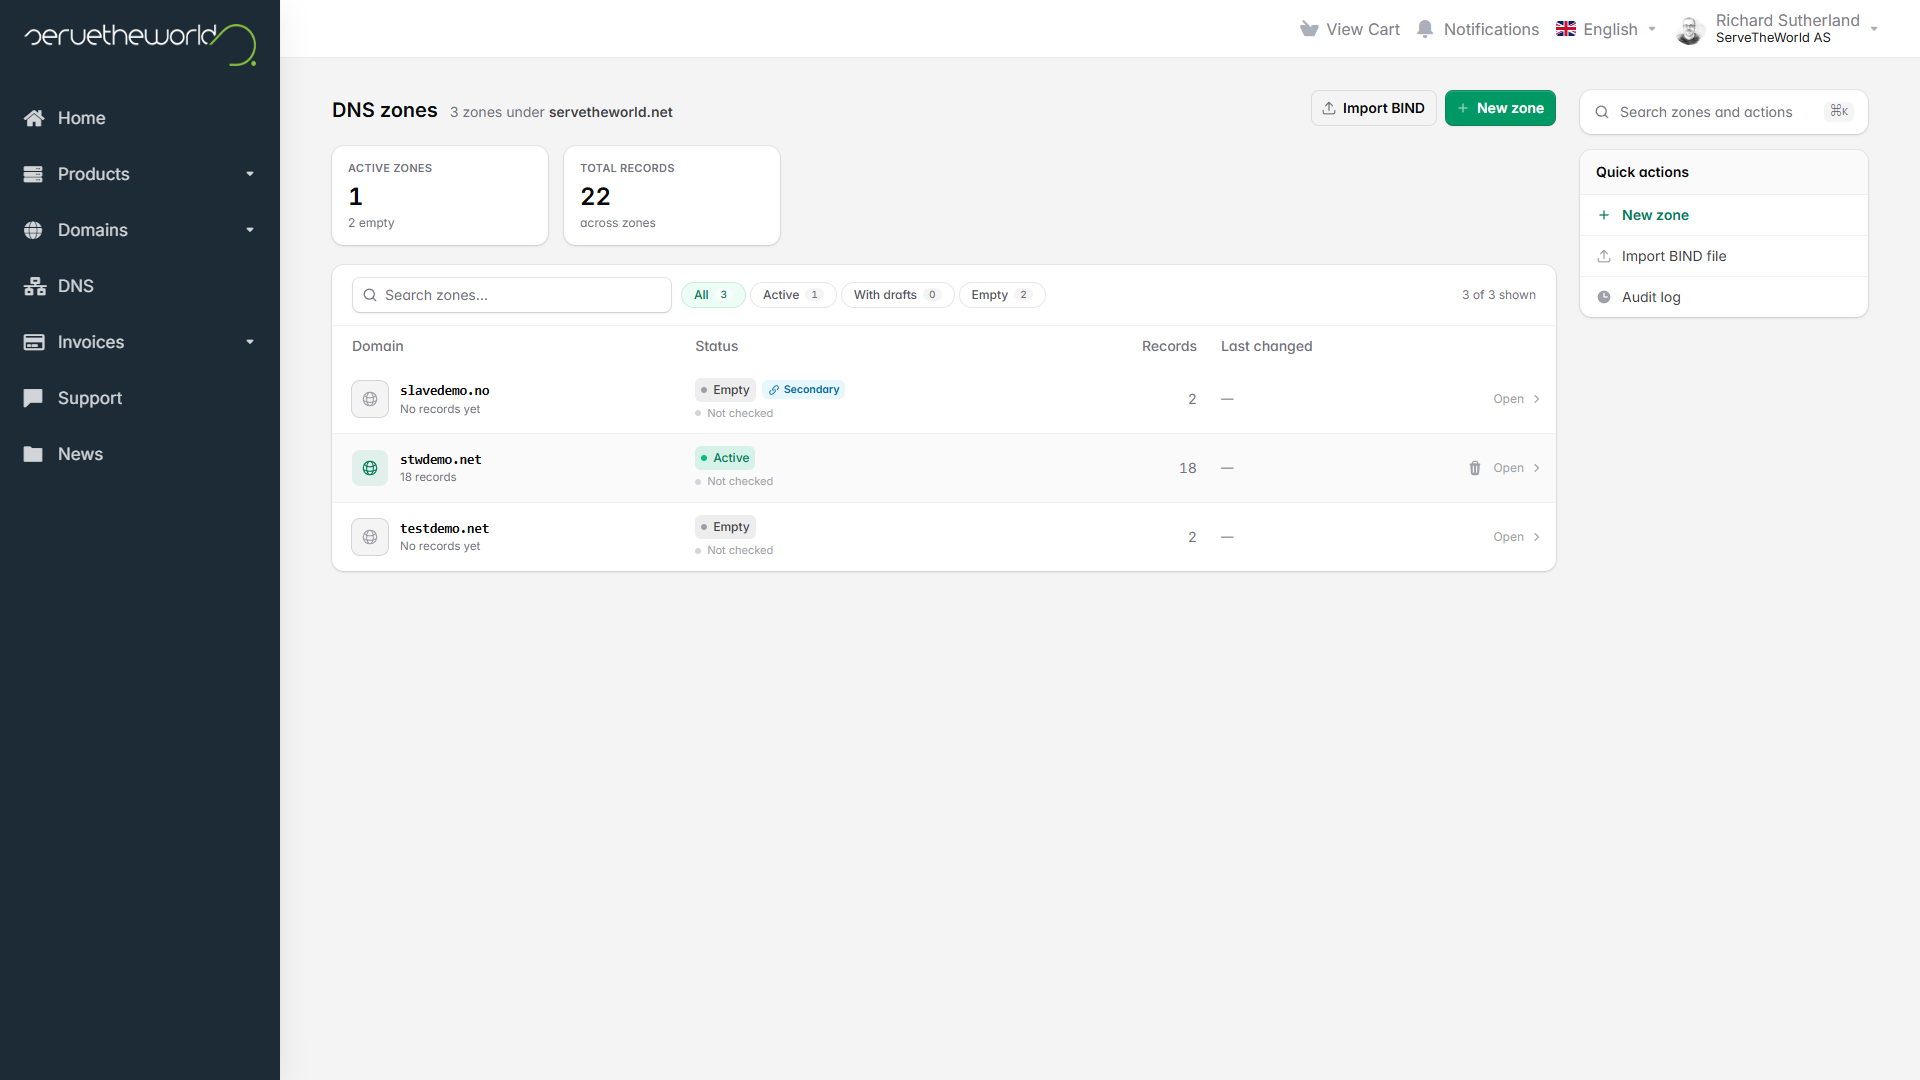
Log in at https://my.servetheworld.net and click DNS in the main menu. The DNS zones screen lists every domain whose DNS you can manage here. Find the domain and click its row, or Open, to manage its records.
If you don't see your domain in the DNS section, its DNS may still be managed in the older Plesk editor during the transition. In that case, open the relevant web hosting account under Products → My Products → Manage → DNS Settings and edit the zone there.
Open a zone and read the records
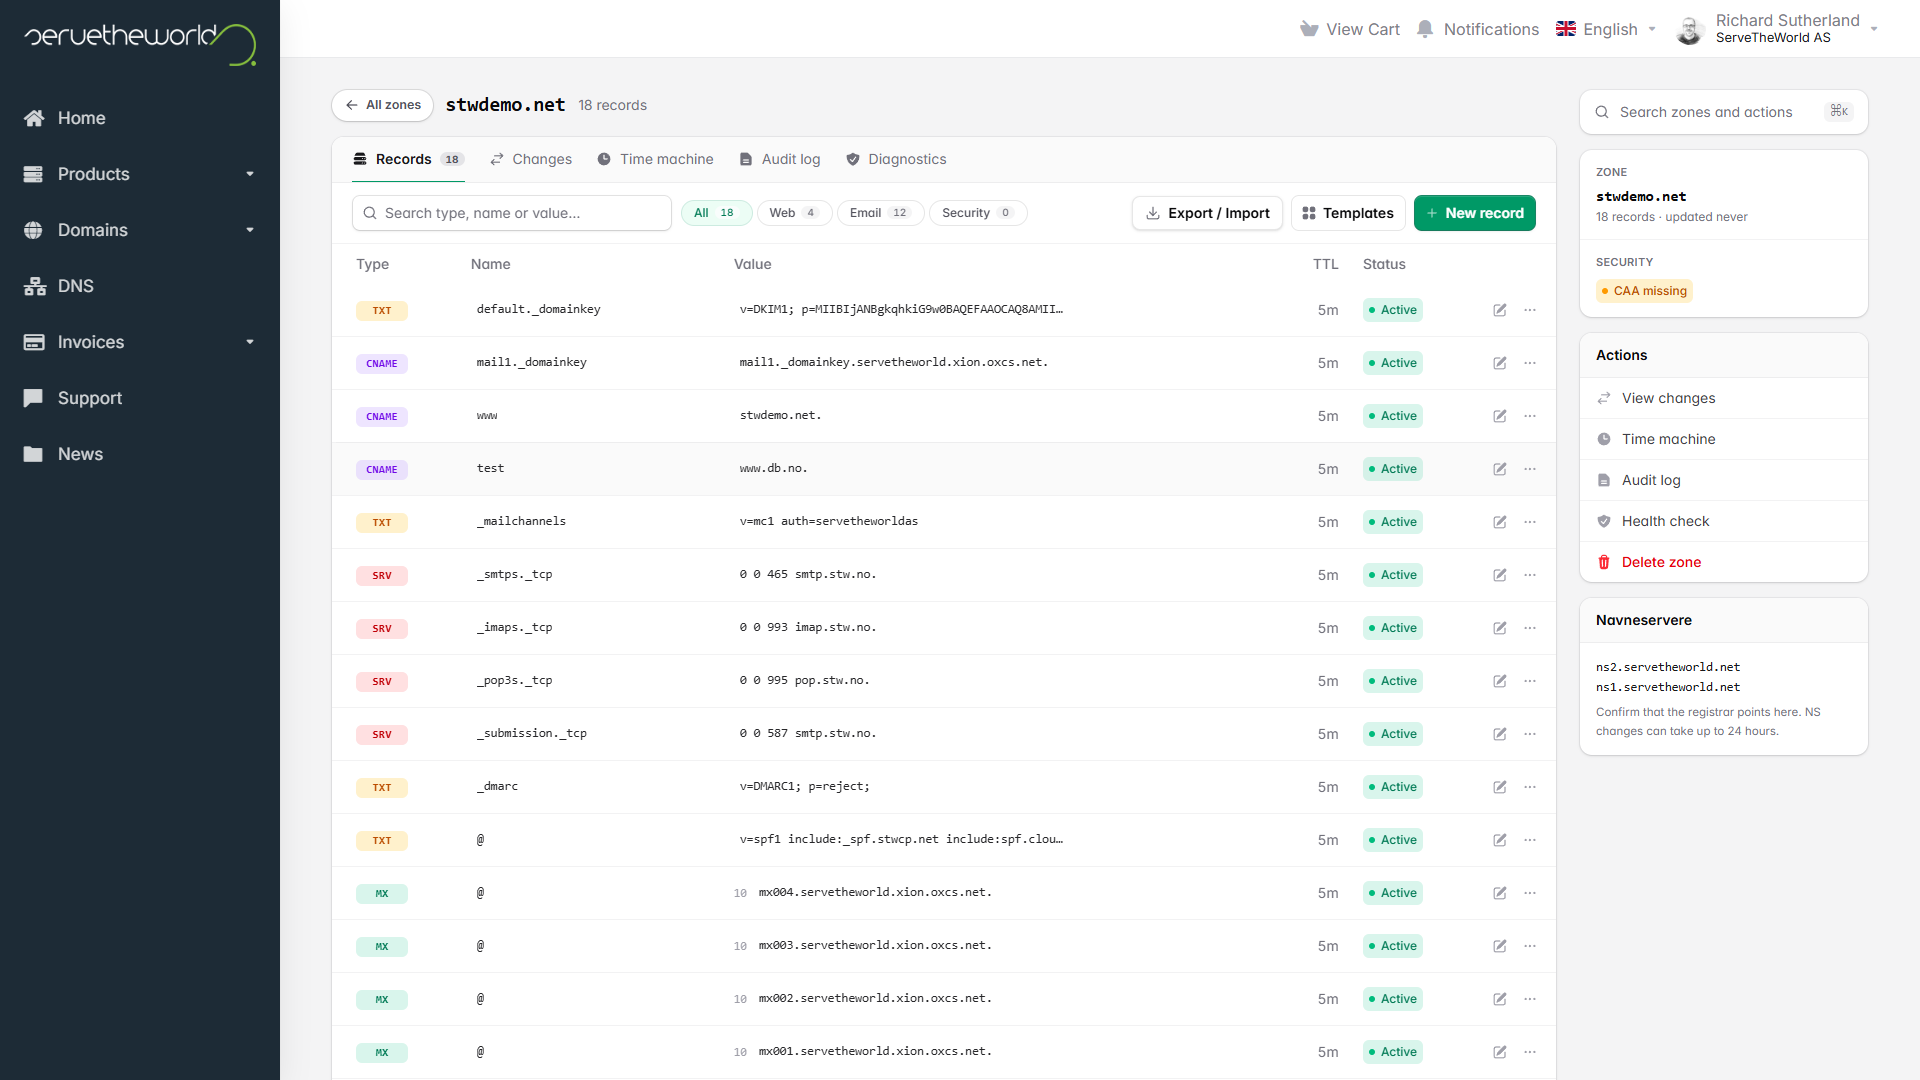
A zone holds all the DNS records for one domain. Open a zone to view and change them.
Inside the zone, the Records tab lists each record by Type, Name, Value, TTL, and Status. You can use the search box to filter by type, name, or value, and use the Web, Email, and Security filters to narrow the list. The @ symbol in the Name column means the domain itself, for example yourdomain.no with no prefix.
See Common DNS Records for a guide on what each field and record type does.
Add or change a DNS record
- Open the zone and stay on the Records tab.
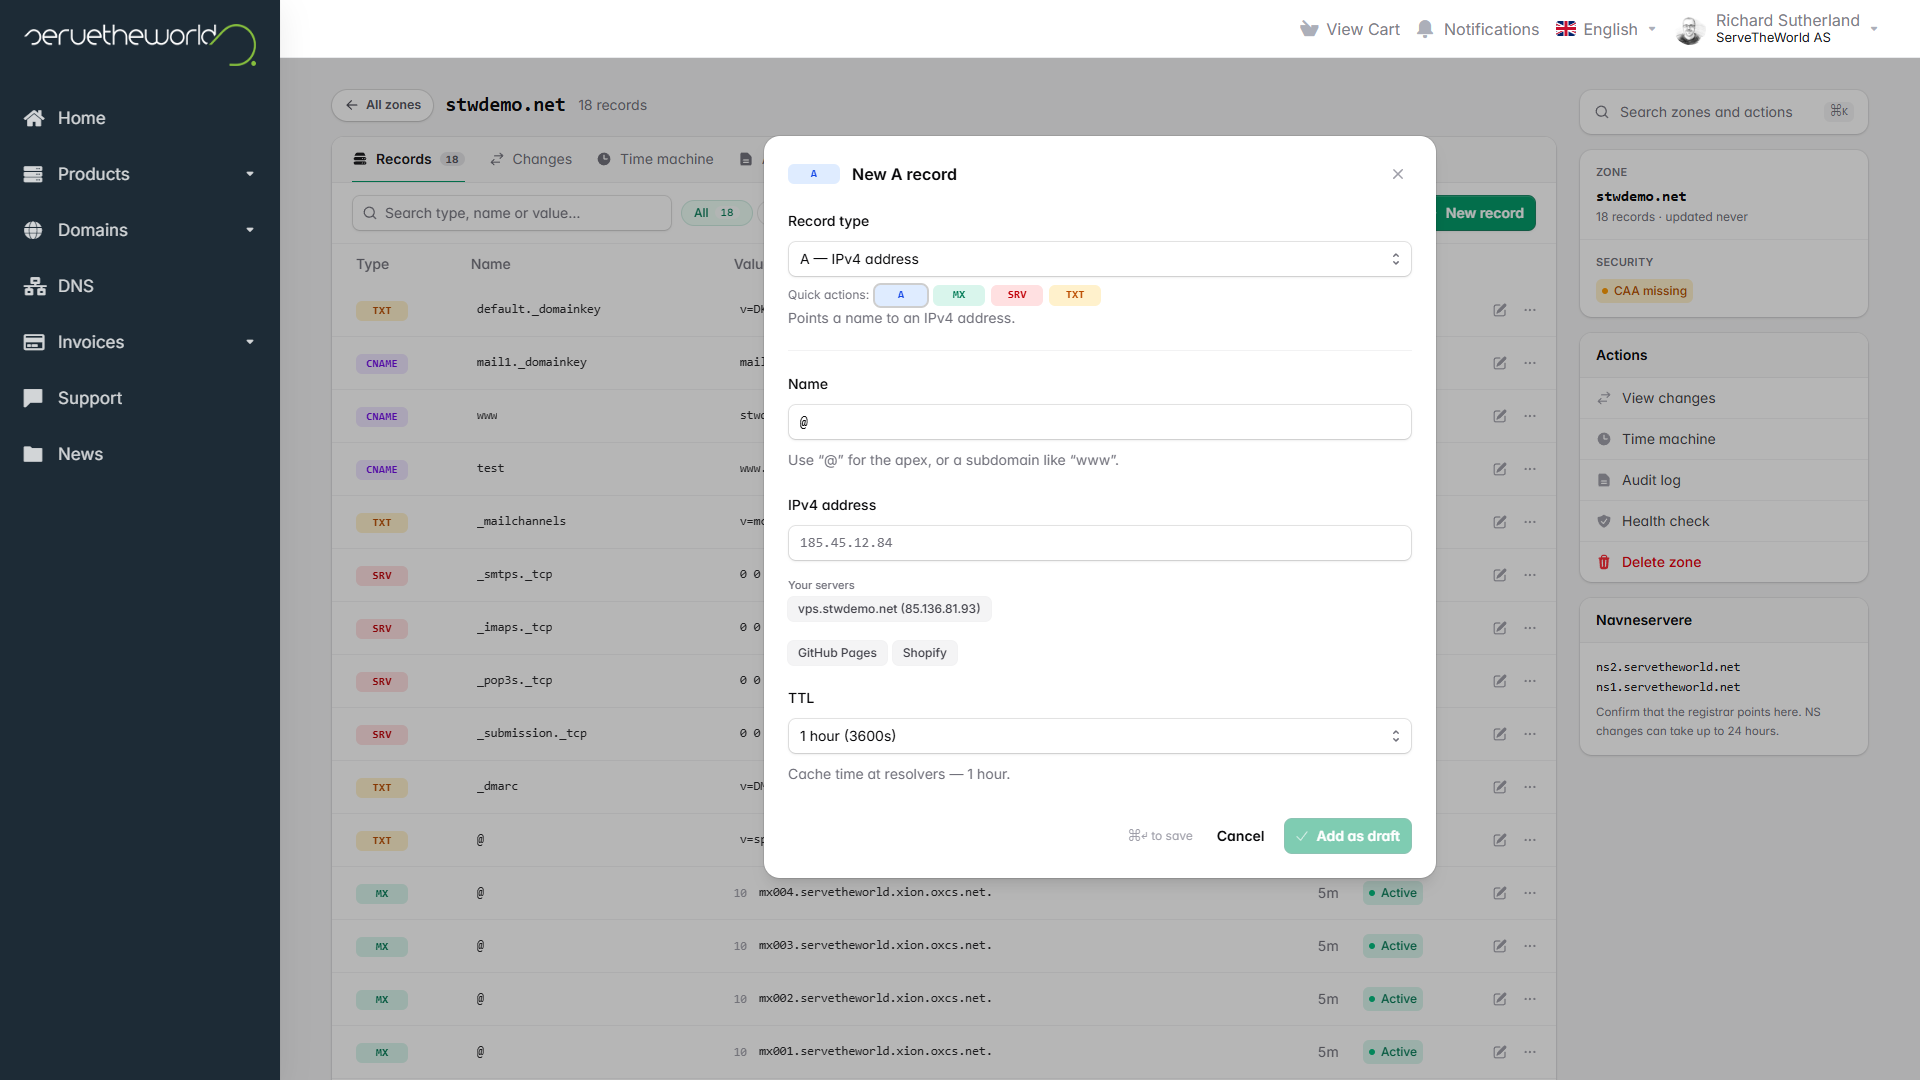
- To add a record, click New record, choose the Record type, fill in the Name and value fields, choose a TTL, then click Add as draft. When you add an A record, the Your servers shortcut can fill in the IP address of a hosting service attached to your account, so you don't have to look it up.
- To change a record, click Edit on its row, update the field, then click Save change.
- To delete a record, click Edit on its row, then Delete record.
Nothing is live yet. Adds, edits, and deletions are all saved as drafts until you publish them.
For advice on planning, backing up, and verifying DNS changes, see How to Change DNS.
Review and publish your changes
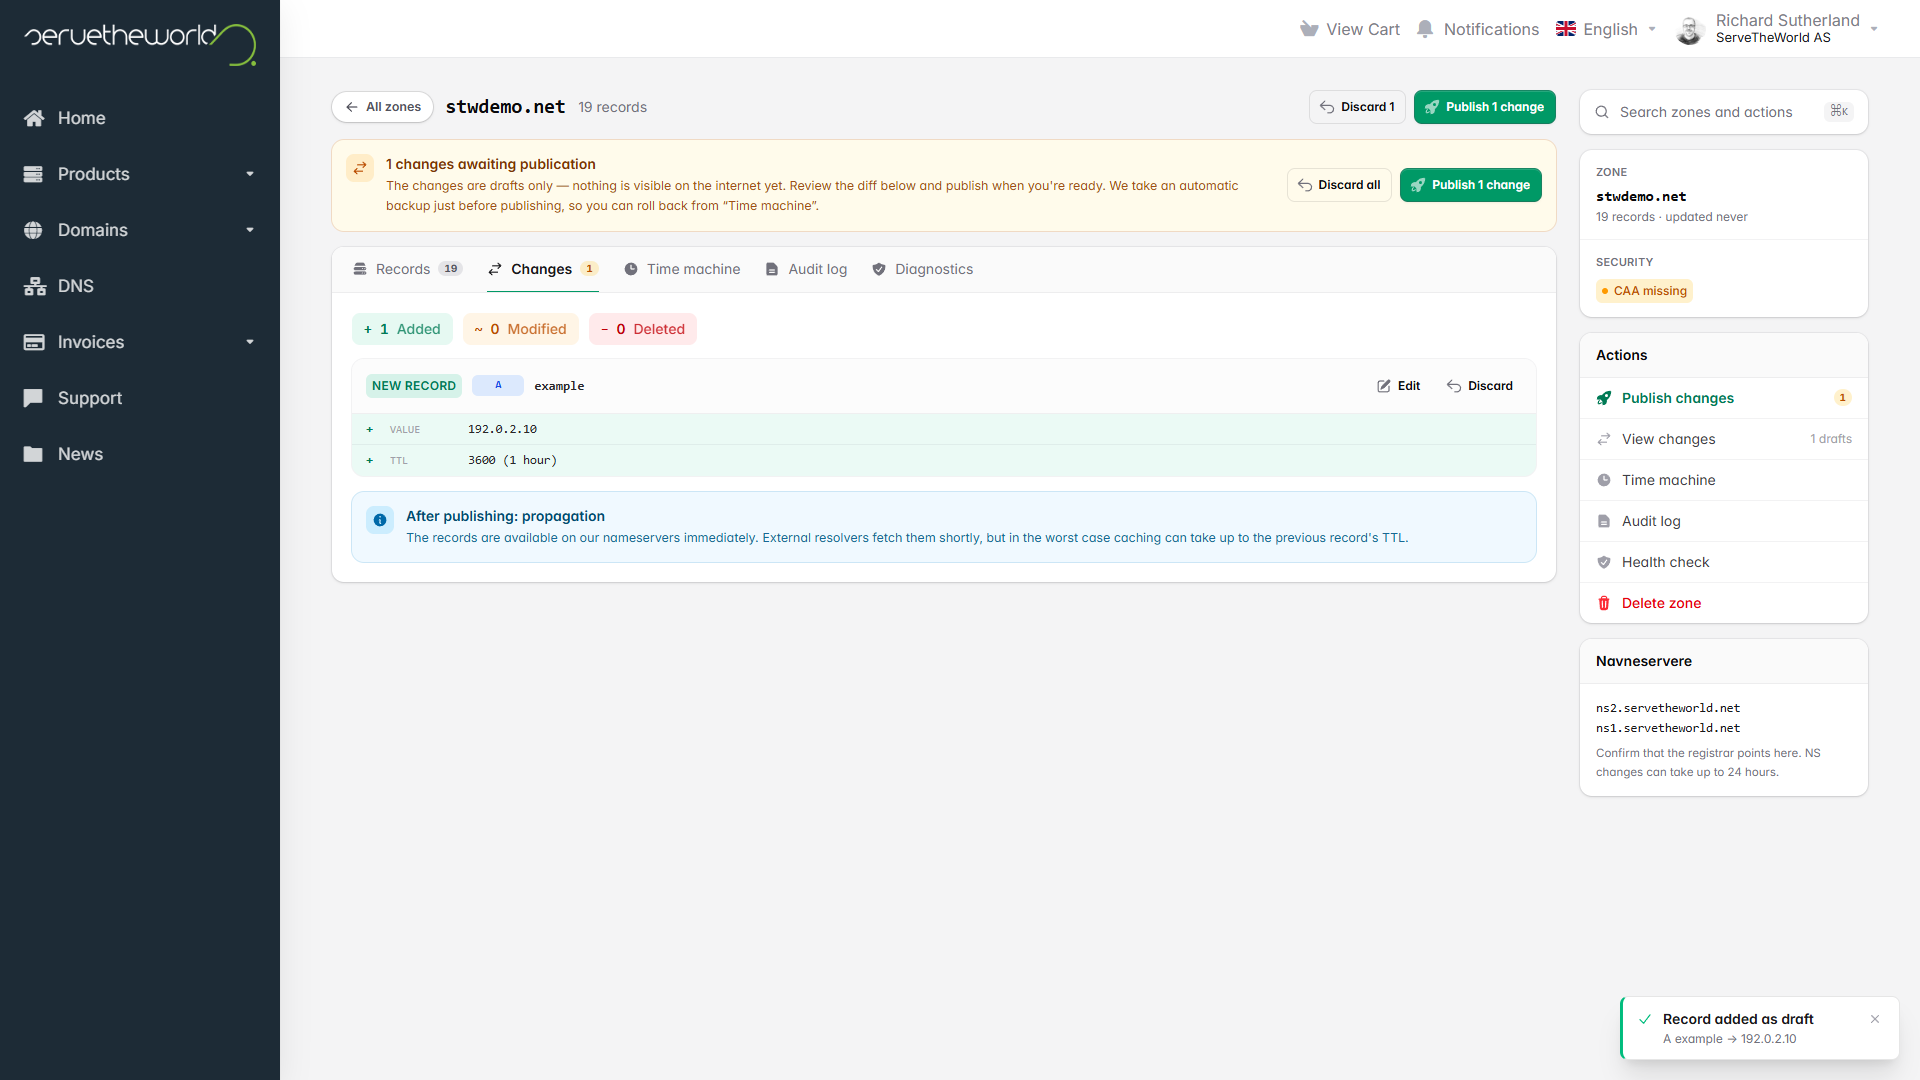
Open the Changes tab, or click View diff to see exactly what will be added, changed, and removed before anything goes live.
- Review the old and new values under Changes.
- Click Publish to apply the changes. You can publish several drafts at once.
- After publishing, each record moves from Pending to Active.
Undo a change you have not published
If you have not published yet, click Discard on a single change in the Changes tab, or Discard all to clear every draft. Discarding leaves your live records exactly as they were.
Examples of creating or changing DNS records
Most record types follow the same pattern. Add the record as a draft, review it under Changes, then publish. Some things you can do here:
- Create an A record — To point
yourdomain.noto a server, click New record, keep the type as A, set Name to@, enter the server's IPv4 address, then Add as draft. - Create an A record for a subdomain — To point
example.yourdomain.noto a server, use the same steps but set Name toexample. - Change an A record — To point a domain or subdomain to a new server, click Edit on the existing A record, replace the value with the new IP address, then Save change.
- Create an MX record — To direct mail for
yourdomain.noto a mail server, choose type MX, set Name to@, enter the mail server hostname under Mail server, and set a Priority (a lower number is preferred first). The form also has quick buttons for ServeTheWorld mail, Google Workspace, Microsoft 365, and Mailgun. - Create a CNAME record — To point
www.yourdomain.noto another hostname, choose type CNAME, set Name towww, and enter the hostname under Target. - Create a TXT record — To add an SPF, DKIM, DMARC, or verification record, choose type TXT, set Name to
@(or the name your provider specifies, such as_dmarcor a DKIM selector), and paste the value under Text value. - Create an SRV record — To direct an application to the correct service and port, choose type SRV and fill in Service name (for example
_imaps._tcp), Priority, Weight, Port, and Target. - Forward a domain to a web address - To send visitors from
yourdomain.noto another address, choose type Forward.
For more detail on website records, see Pointing a Domain. Email DNS Records covers MX, SPF, DKIM, and DMARC, while SRV Records explains the extra fields used for service discovery.
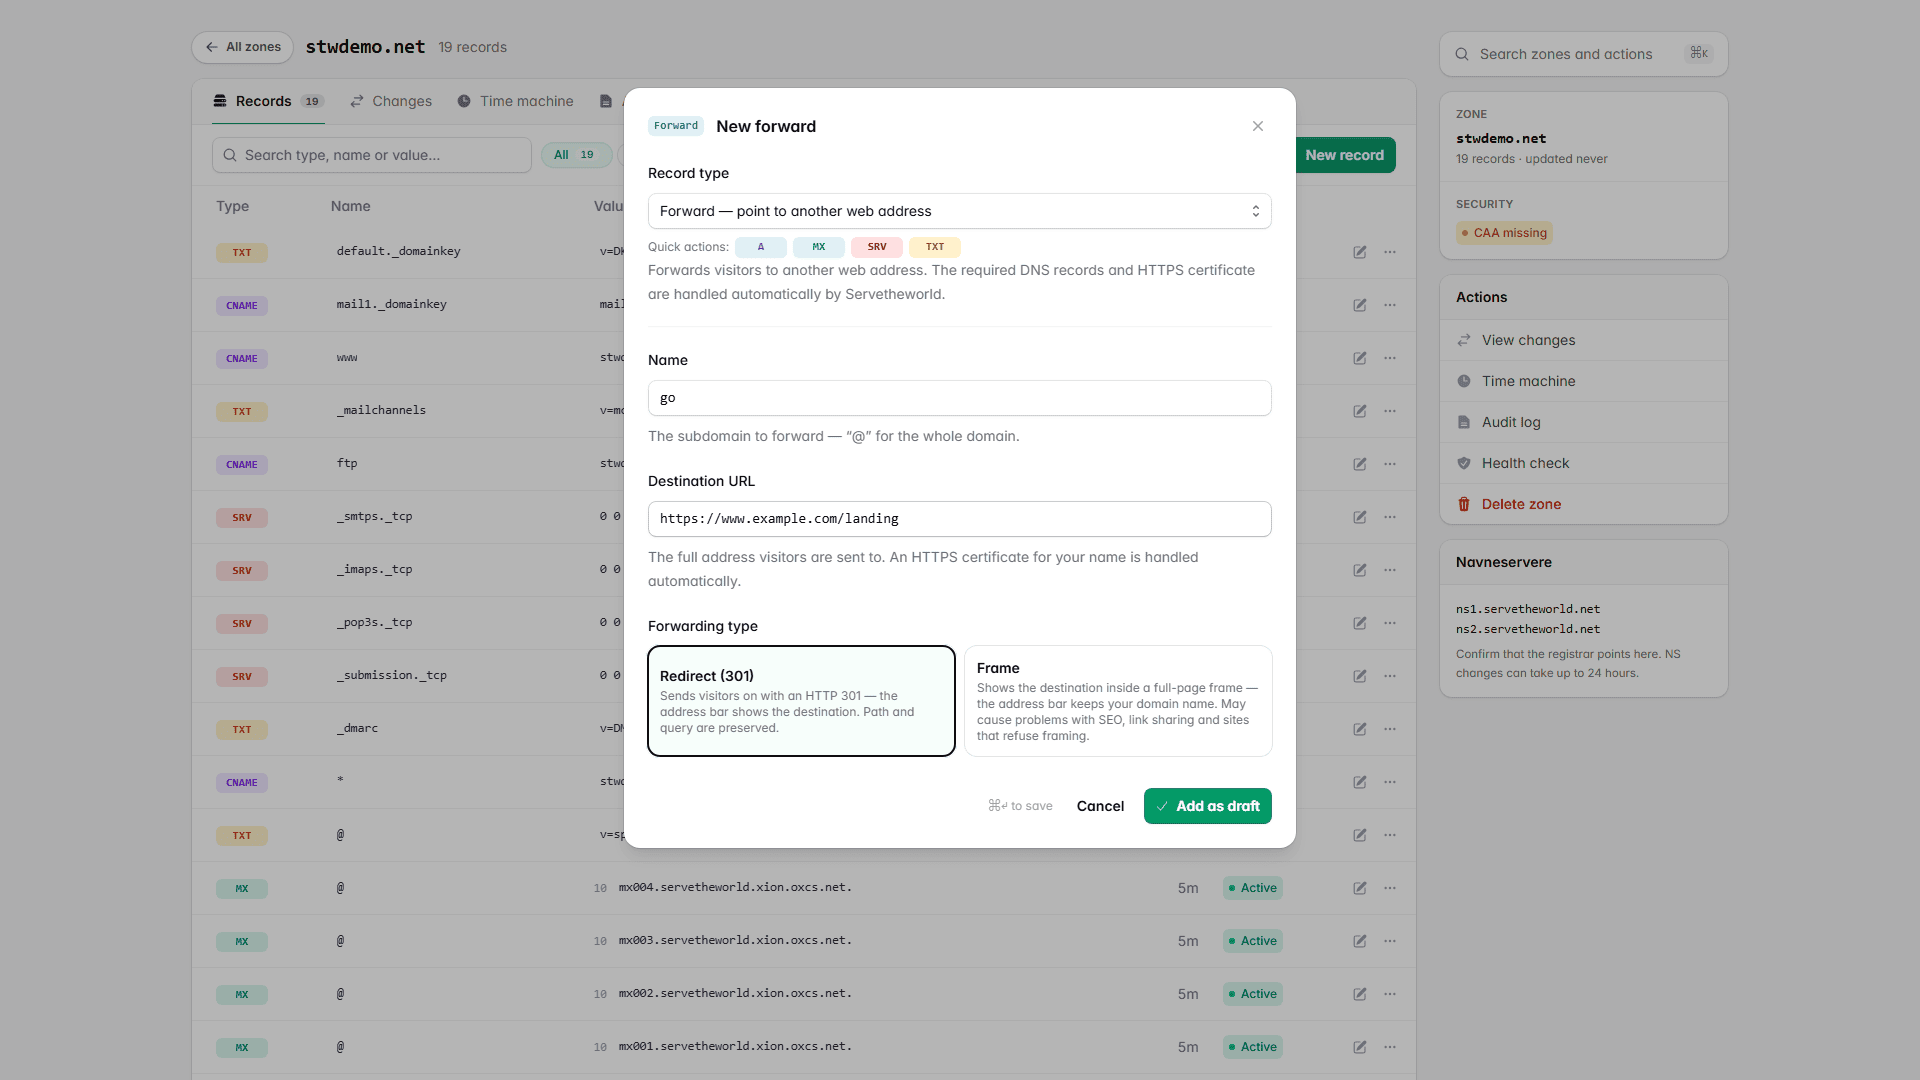
Forward a domain to another web address
A forward sends visitors who go to your domain on to another web address, for example pointing yourdomain.no at a page on a different site. We create the records it needs and issue the HTTPS certificate for your domain automatically.
- Open the zone and click New record.
- Under Record type, choose Forward.
- In Name, enter the subdomain to forward, or
@for the whole domain. A forward on@also coverswwwas lng aswwwhas no records of its own. - In Destination URL, enter the full address visitors should be sent to.
- Choose a Forwarding type:
- Redirect (301) sends visitors onwith an HTTP 301. The address bar shows the destination, and the lath and query are kept.
- Frame shows the destination insude a full-page frame, so the address bar keeps your domain name, but this casn cause problems with search engines, link sharing, and sites that refuse to be framed. 6 - Click Add as draft, then review and publish under Changes.
Point your domain at a service with a template
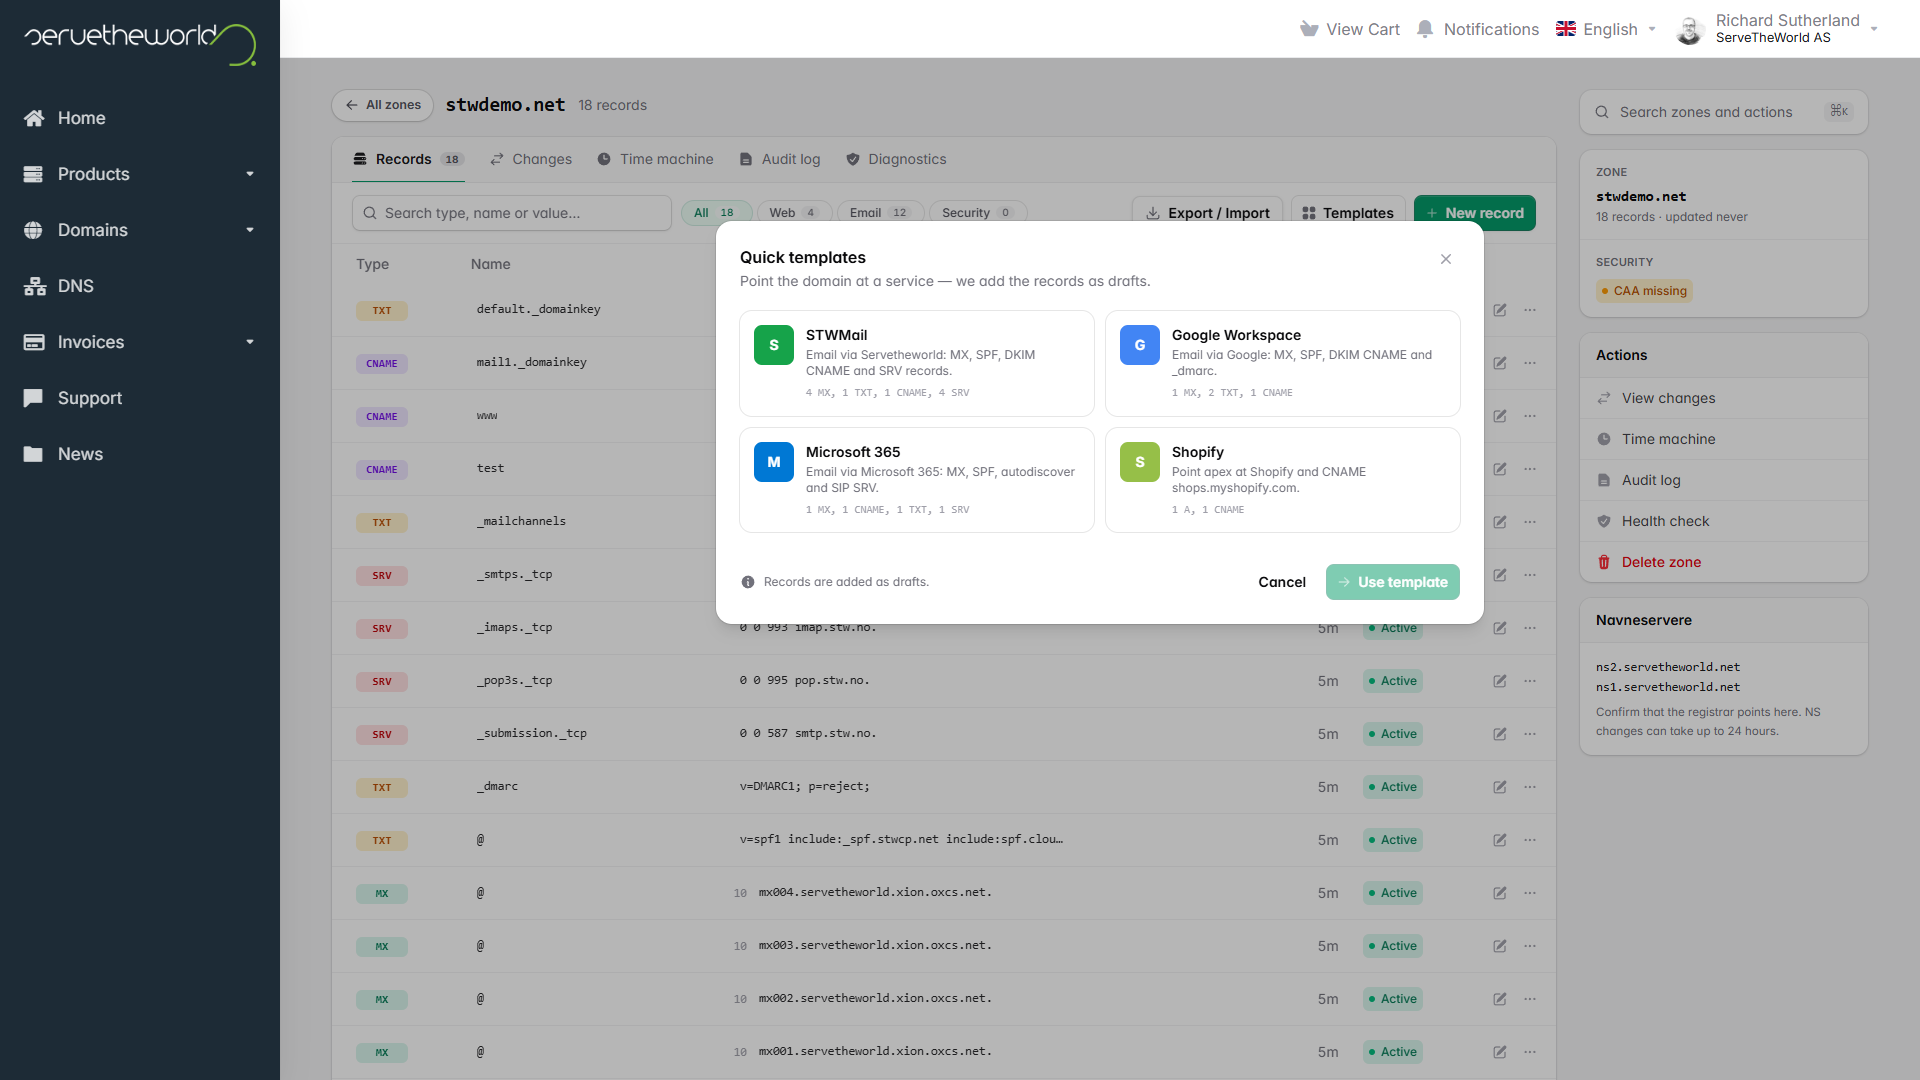
A template adds the records for a common setup in one step, so you don't have to enter them by hand. Open the zone and click Templates.
If the domain has ServeTheWorld web hosting, you'll be offered a From your server template under Detected for this domain. This adds the records that point the domain at your hosting, which is useful when the hosting exists but the DNS isn't set up yet. Select it and click Use template.
You can also point the domain at an email or service. Choose STWMail, Google Workspace, Microsoft 365, or Shopify, then click Use template. Every template adds its records as drafts, so you can review them under Changes before publishing.
See Email DNS Records to understand what the MX, SPF, DKIM, and DMARC records in an email setup do.
Back up or move a zone
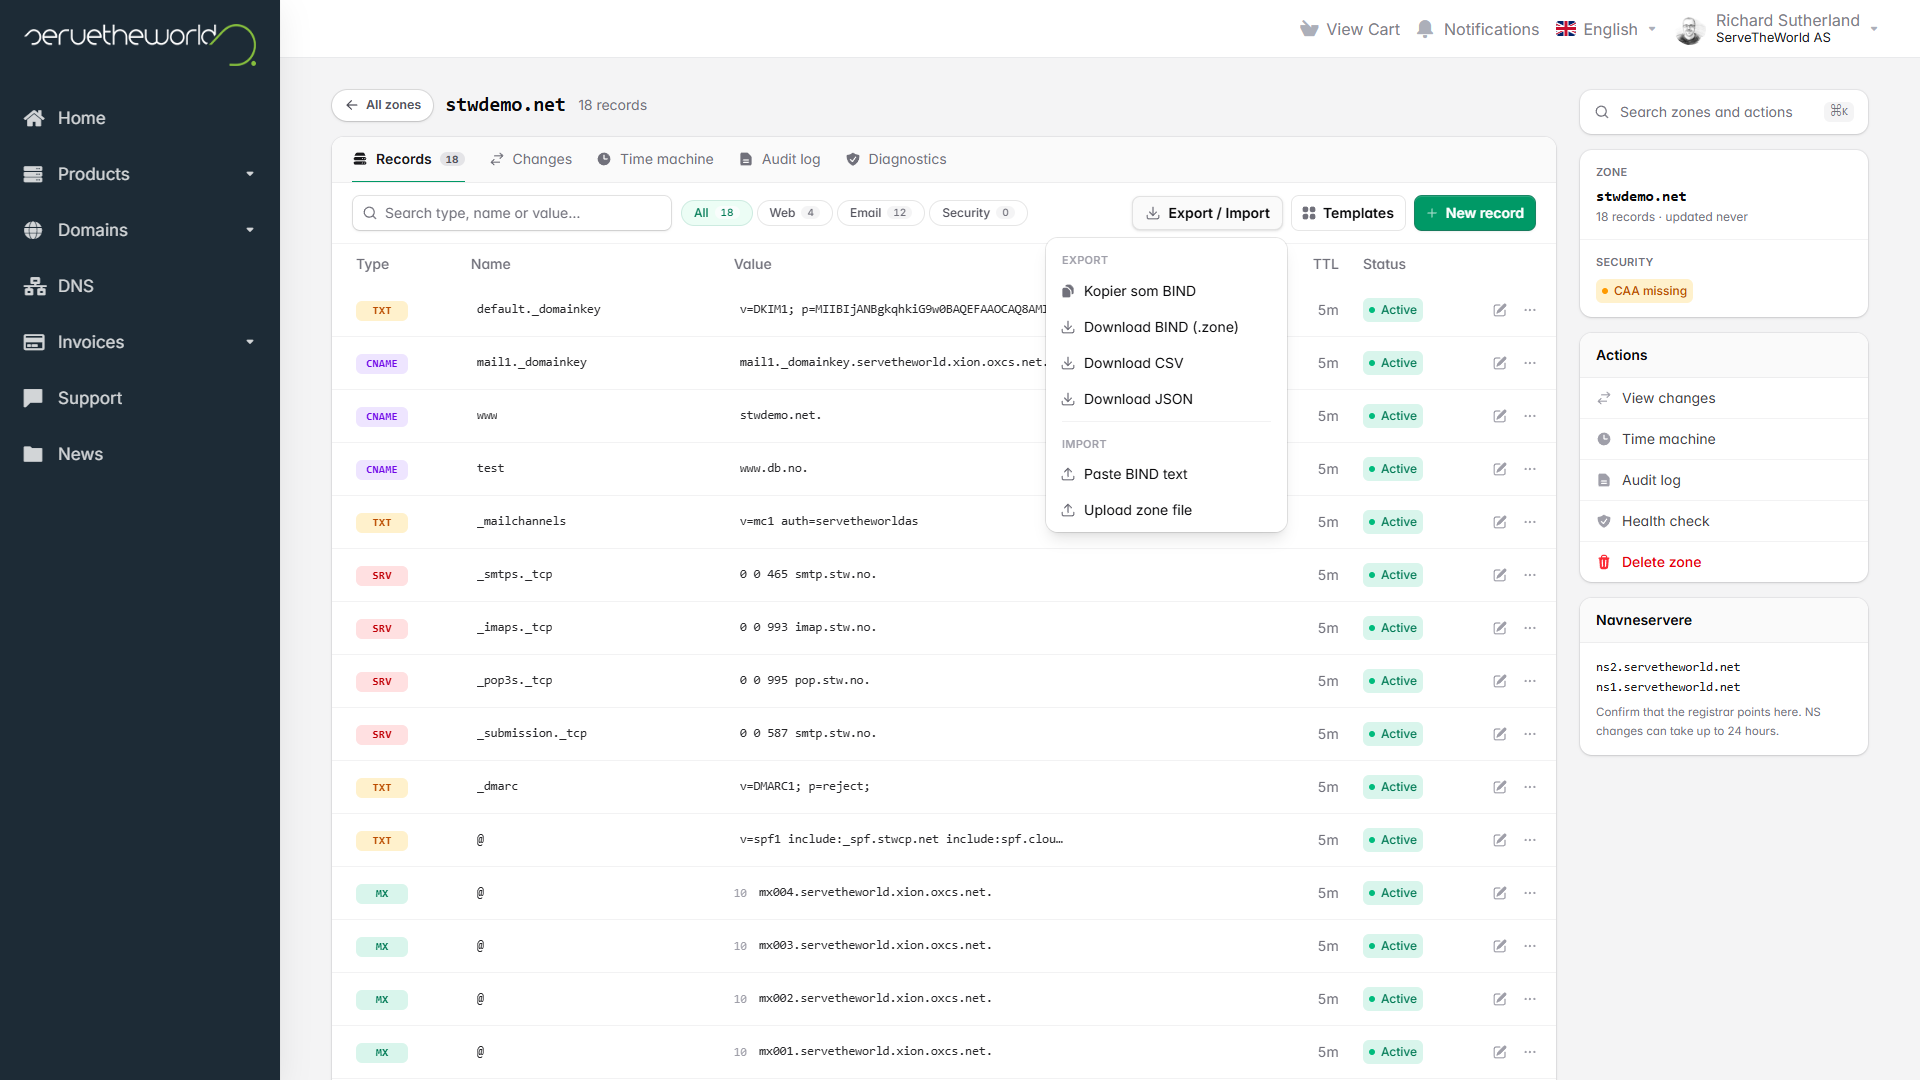
Exporting a zone creates a copy of its DNS records for backup or transfer to another DNS provider. Importing lets you bring records from an existing DNS setup into ServeTheWorld without adding each one by hand.
Click Export / Import inside a zone.
- Export — Copy as BIND, or download the zone as a
.zonefile, CSV, or JSON for a backup or migration. - Import — Paste BIND text or upload a zone file. Imported records are shown in a preview, added as drafts, and can be reviewed under Changes before you publish. Invalid lines are reported and skipped, and the apex NS records we manage automatically are ignored.
BIND is a widely used plain-text format for DNS records, often saved as a .zone file. You may receive one when moving DNS from another provider.
Roll back a change with Time machine
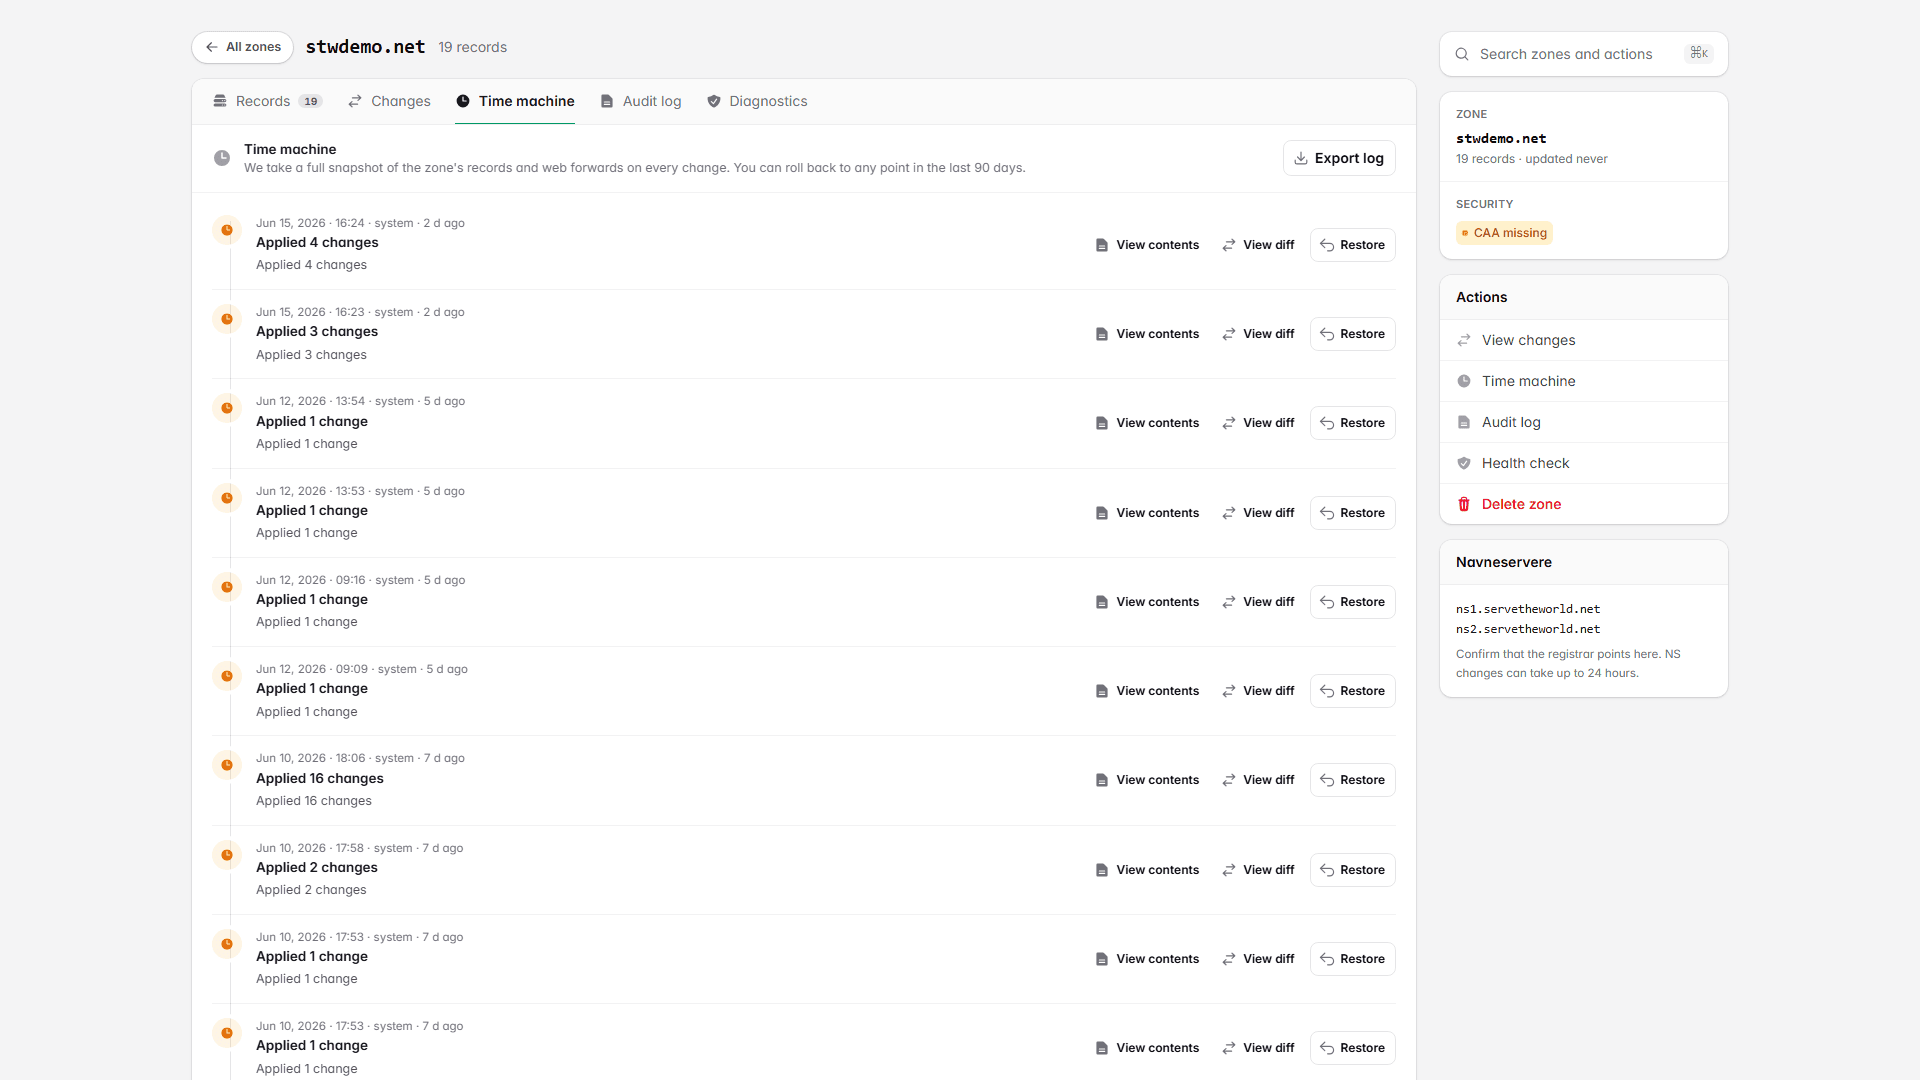
Time machine keeps a full snapshot of the zone every time it changes, so your can return to an earlier state if a change causes a problem. Shapshots are kept for 90 days.
Open the Time machine tab. Each entry shows the date, who made the change, and a summary.
- View contents shows the full set of records in that snapshot.
- View diff shows what changed at that point.
- Restore rolls the zone back to that snapshot.
Restore takes effect immediately, so check the snapshot with View contents or View diff first.
See who changed what with the audit log
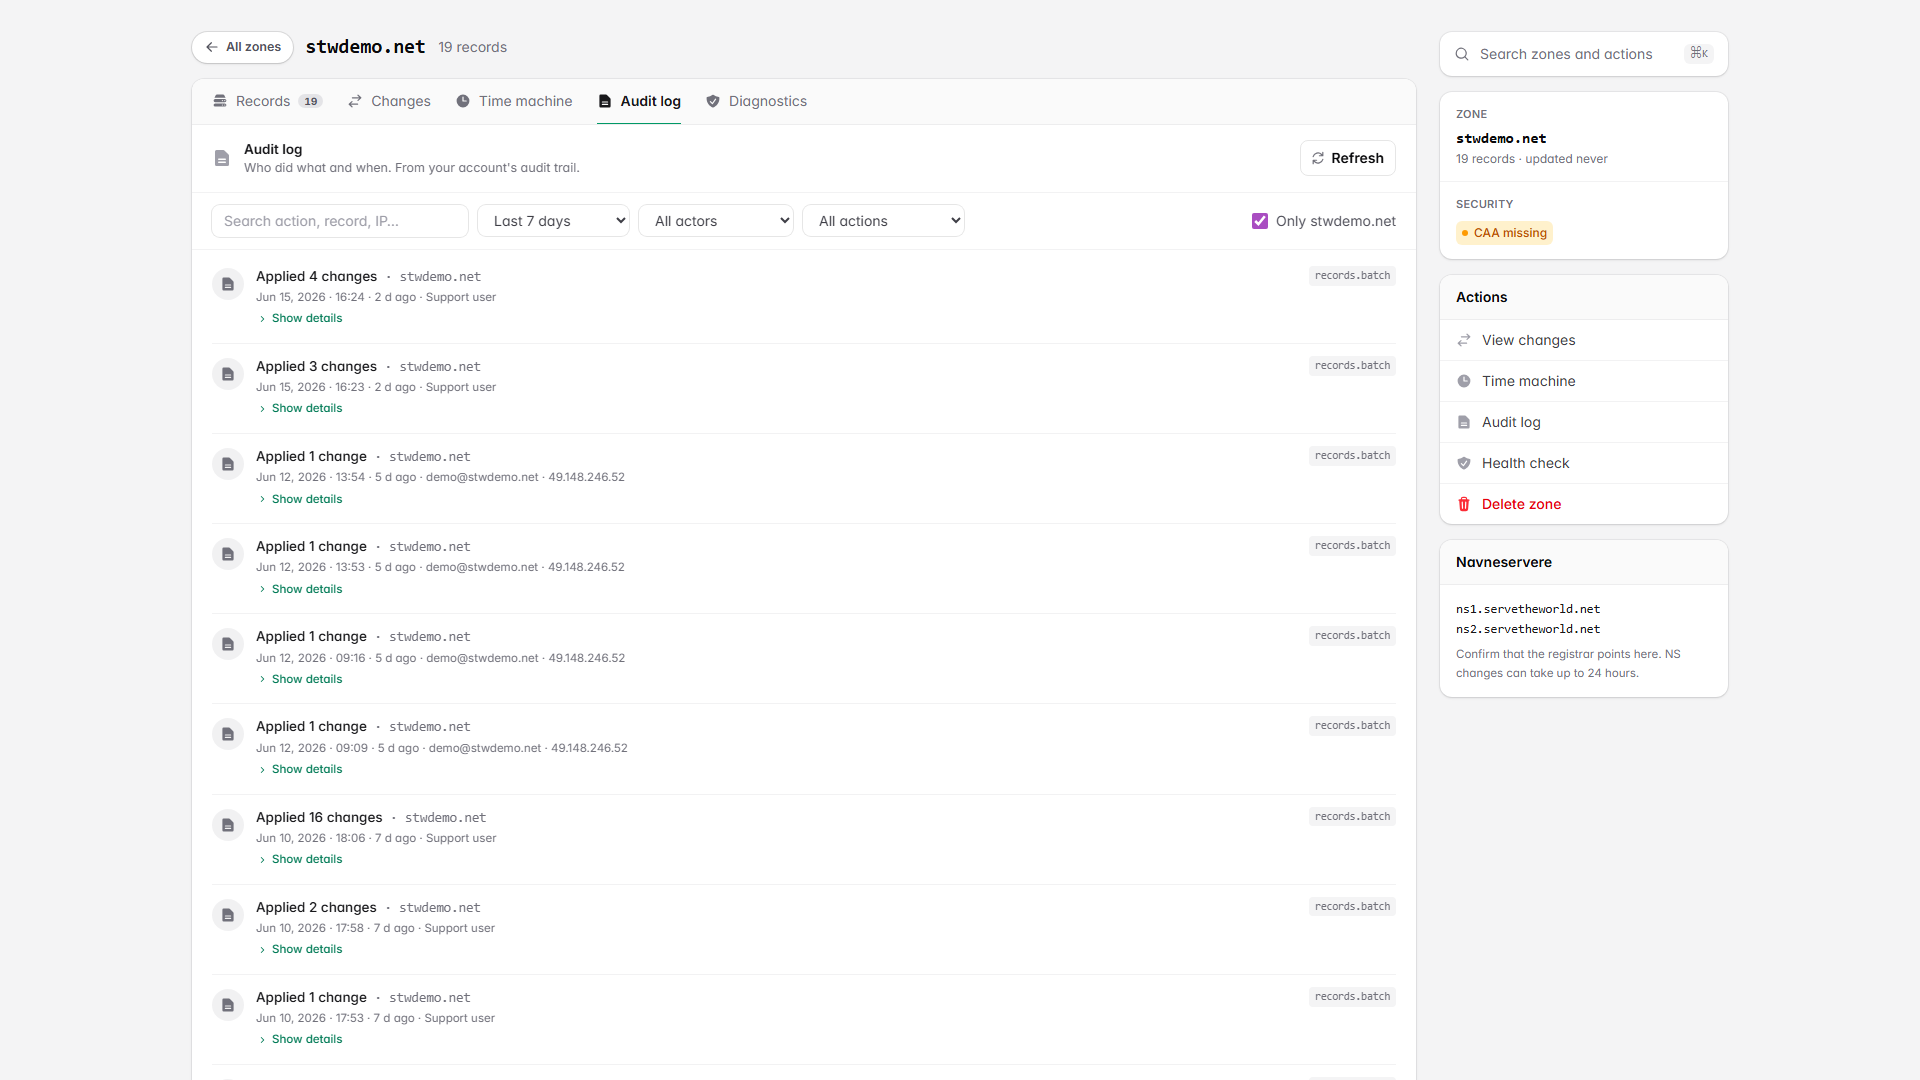
The audit log records who changed your DNS and when, which is useful for checking an unexpected change or confirming a teammate's work.
Open the Audit log tab. Each entry shows the action, the affected zone, the date, and the person or system that made the change. You can filter by time period, actor, action, or zone, and click Show details to see the full before-and-after for an entry.
Check whether a change has taken effect
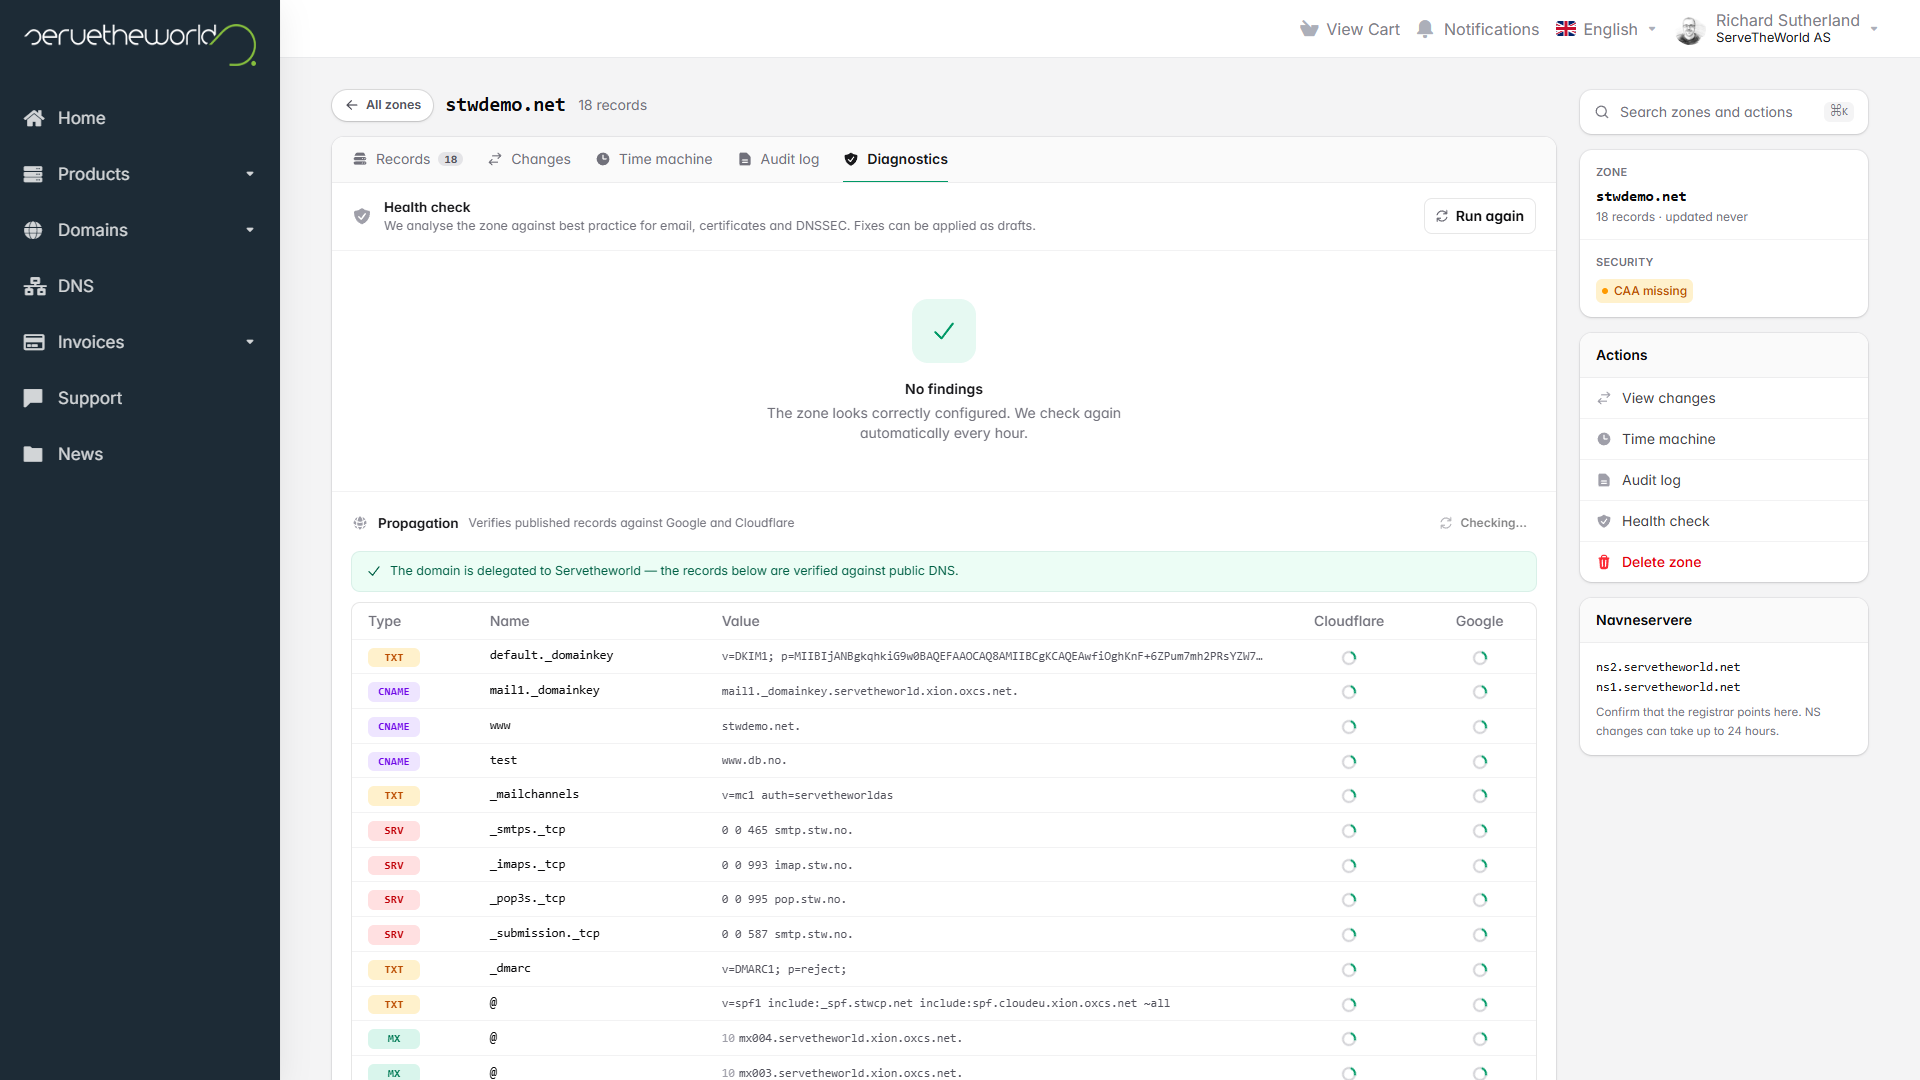
Open the Diagnostics tab to check the zone's health and to compare your published records against public resolvers (Google and Cloudflare). Click Check now to run the check again.
A draft cannot show up in these checks because it is not yet live. Publish the change first, then check. Public resolvers can also keep an older answer cached for a while, so a recent change may take time to appear everywhere.
See DNS Propagation for a step-by-step way to compare authoritative answers, public resolvers, and local caches.